
Multiple environments
Create and use multiple environments.
- If you need to use different setups for different domains, either within your organization or for your clients, consider using an environment for each domain.
- Control changes to your production environment with separate environments for development and testing.
Limitations
- Event identification is not separated by environment, meaning the same device will get the same
visitorIdin all environments.If this is something you would like to use, let us know by leaving feedback on our public roadmap.
Managing environments
To manage your environments, navigate to Settings → Environments.
Here you can create new environments, or delete existing ones.
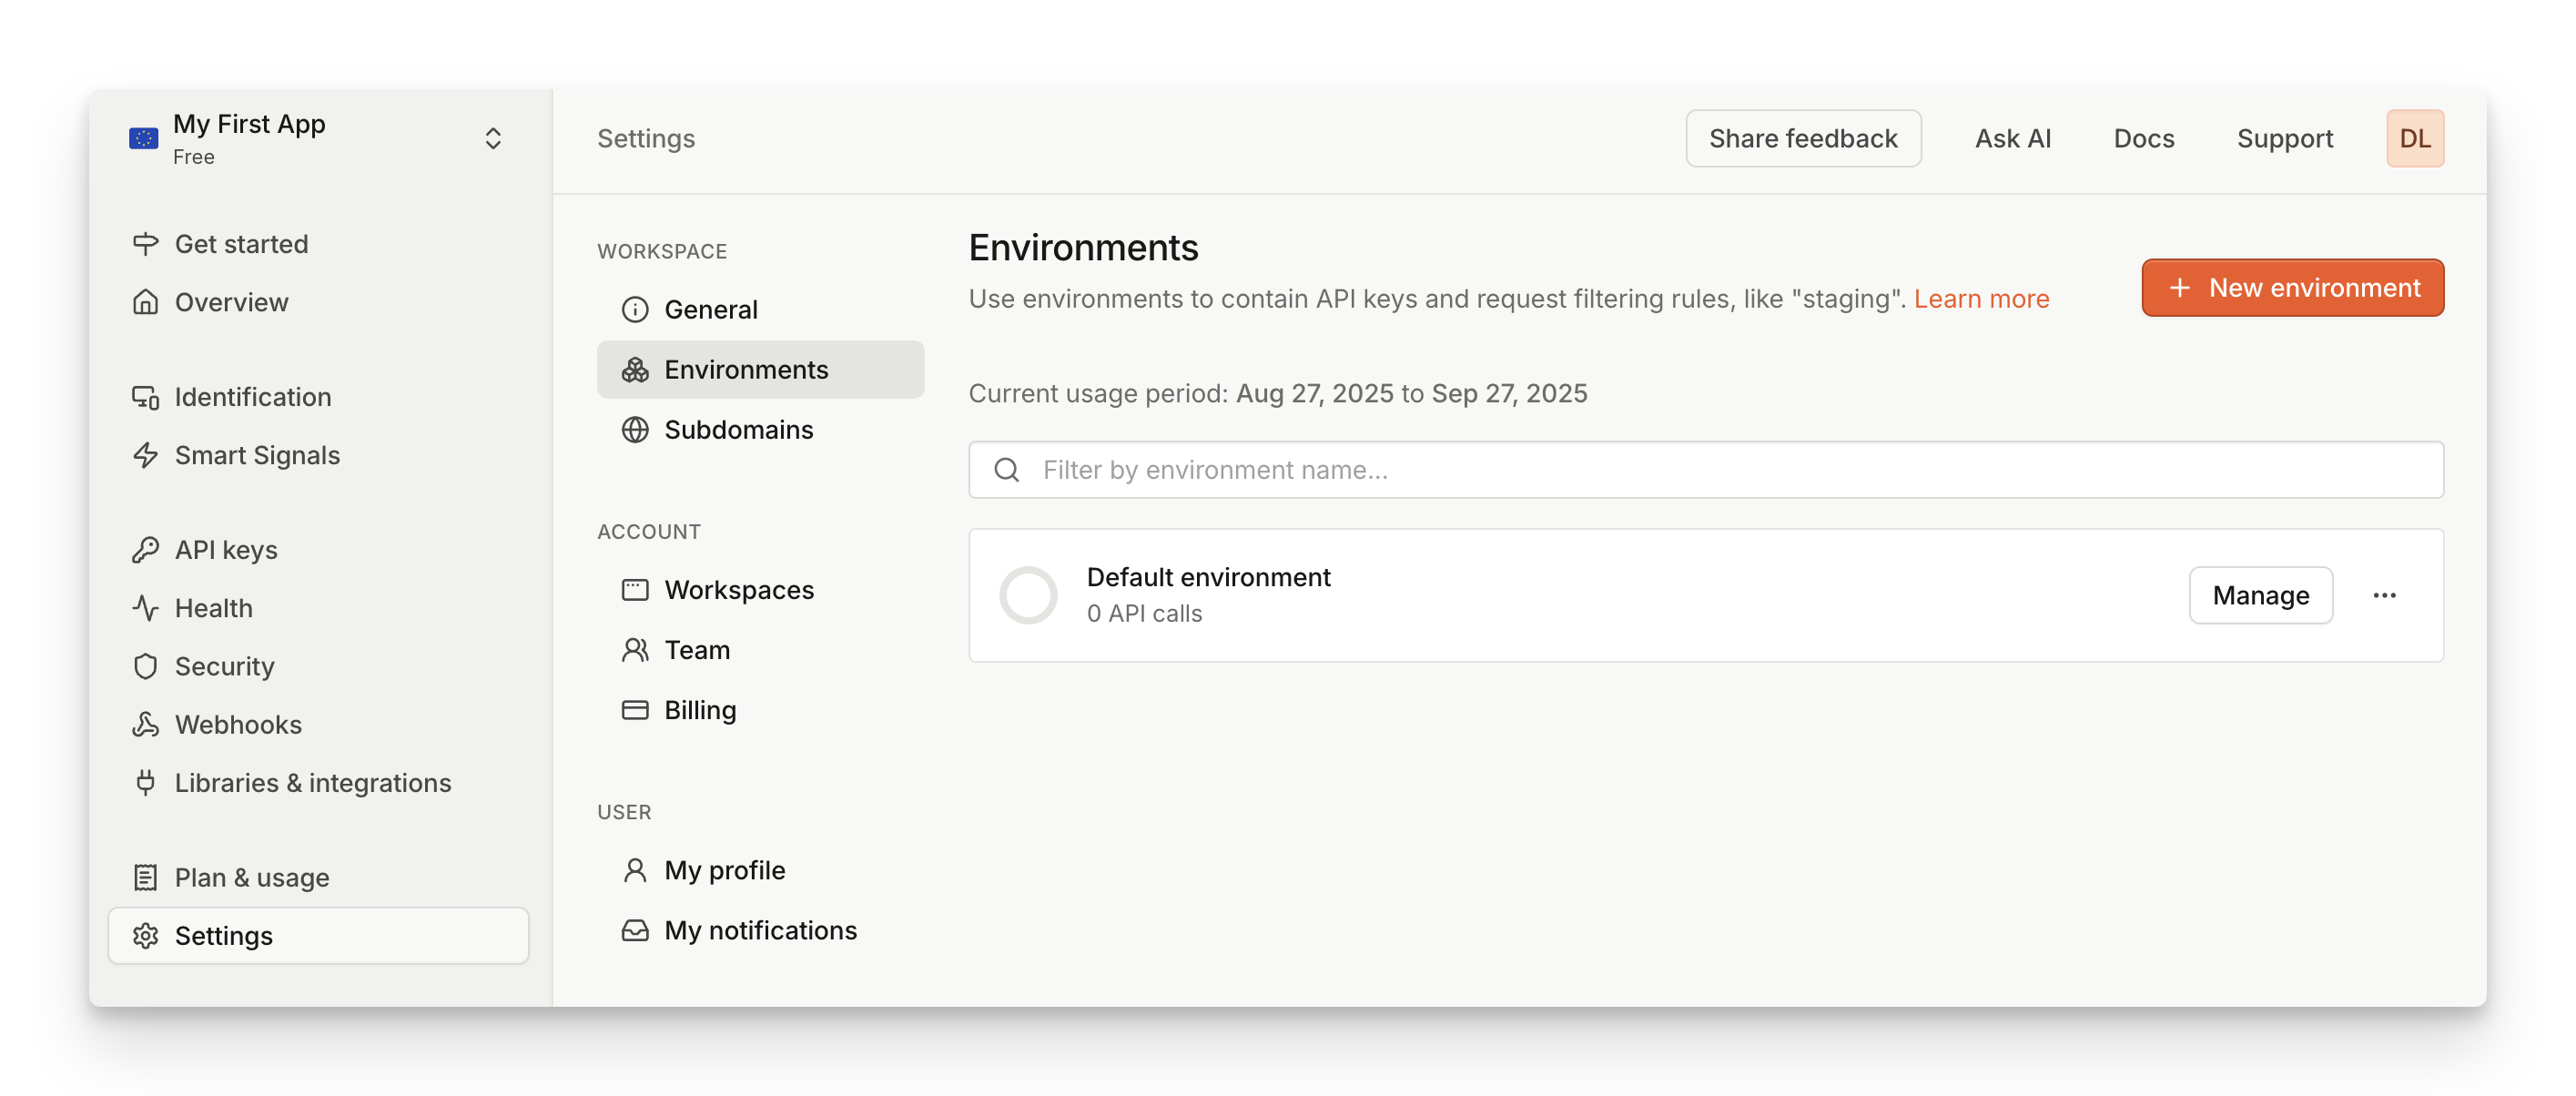
Your application will always have a default environment which cannot be removed.
Event identification
Event identification is not separated by environment, meaning the same device will get the same visitorId in all environments.
Configuring monthly usage limits
When managing environments, you can adjust monthly usage limit for each environment. This is useful when you don't want your testing environment, or an environment dedicated to an external team, to make excessive number of API calls.
You can configure the usage threshold and what happens when the threshold is reached.
- Selecting Notify turns on email notification when the environment reaches the set limit.
- Selecting Restrict turns on email notification, and will prevent any further calls to be made from this environment when the limit is reached. Restricting usage is available to Enterprise customers only.
The usage limit is reset every month on your billing date. For enterprise customers, this happens at the start of calendar month.
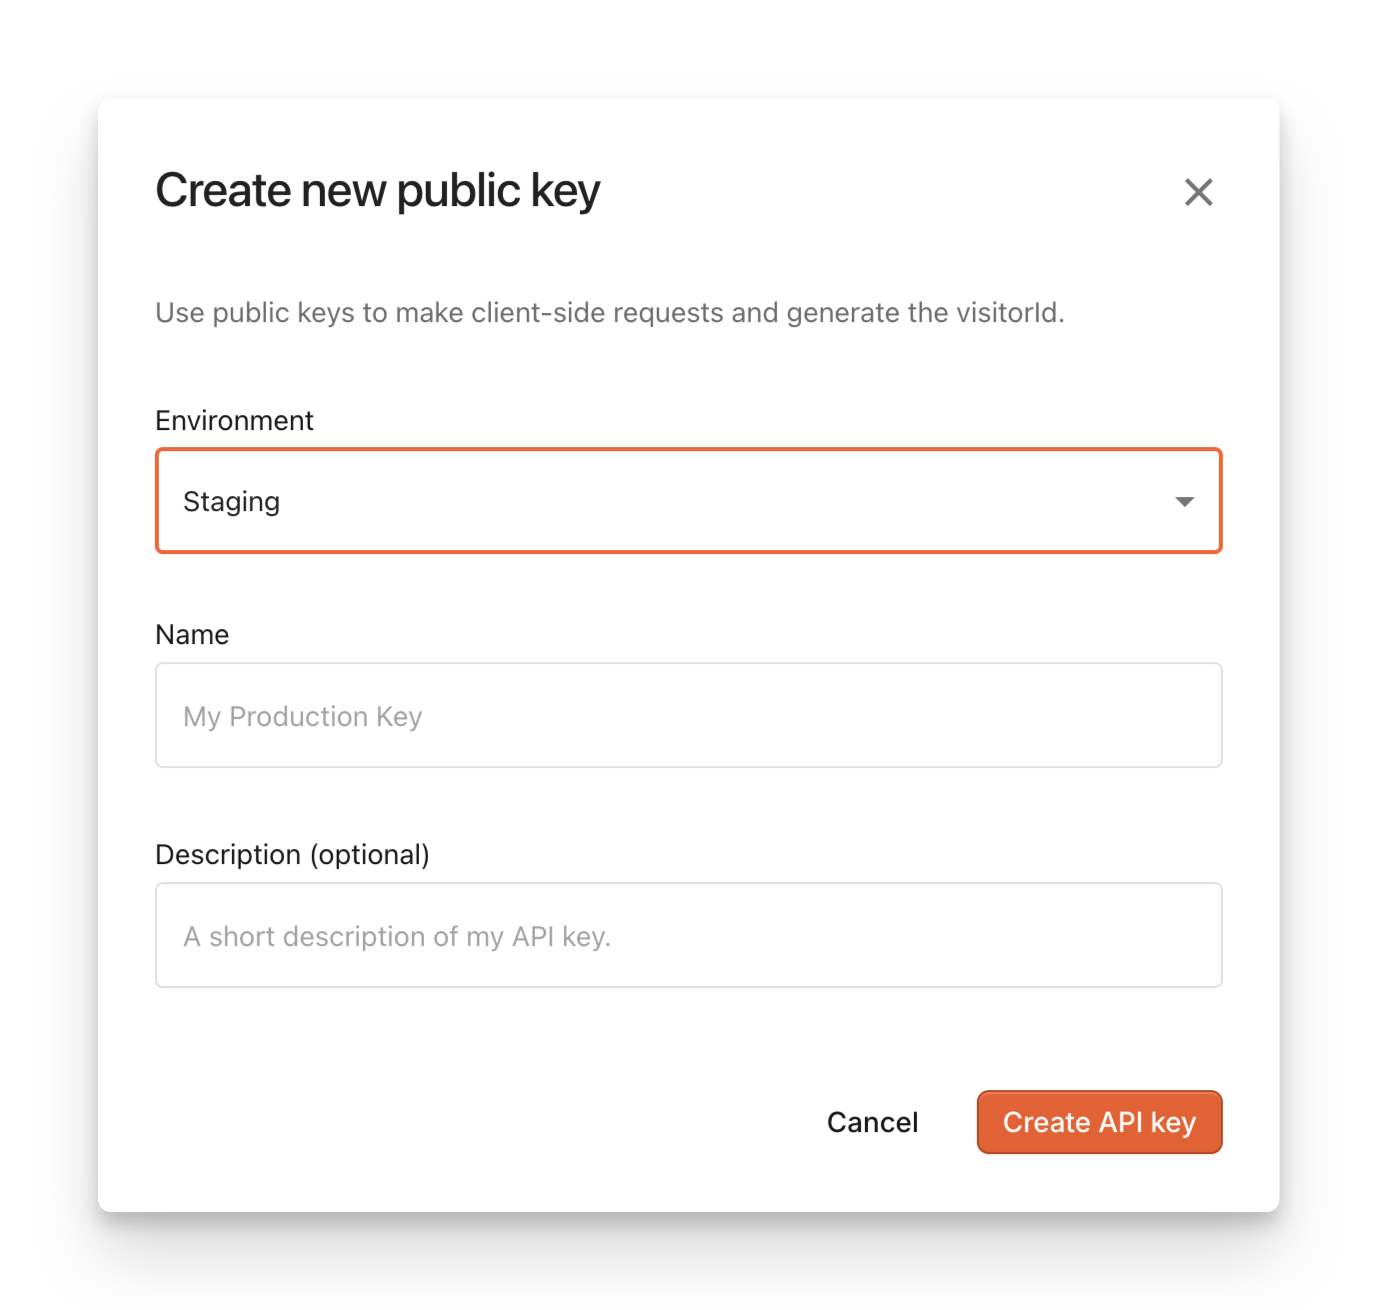
Public API keys
When creating new public API keys, you can assign them to a specific environment. By doing this, identification events registered with a specific environment can then be filtered by different set of request filtering rules.

To create a new API key for specific environment, go to API Keys. Changing environment for an existing key is not supported.
Server API keys
When creating secret API keys to be used with Server API, you can optionally choose to limit the scope to only specific environment. For environment-scoped keys, Server API will operate only with identification events with a matching environment. On the other hand, workspace-scoped keys allow you to utilize Server API with events from any environment.
To create a new API key for specific environment, go to API Keys. Changing environment for an existing key is not supported.
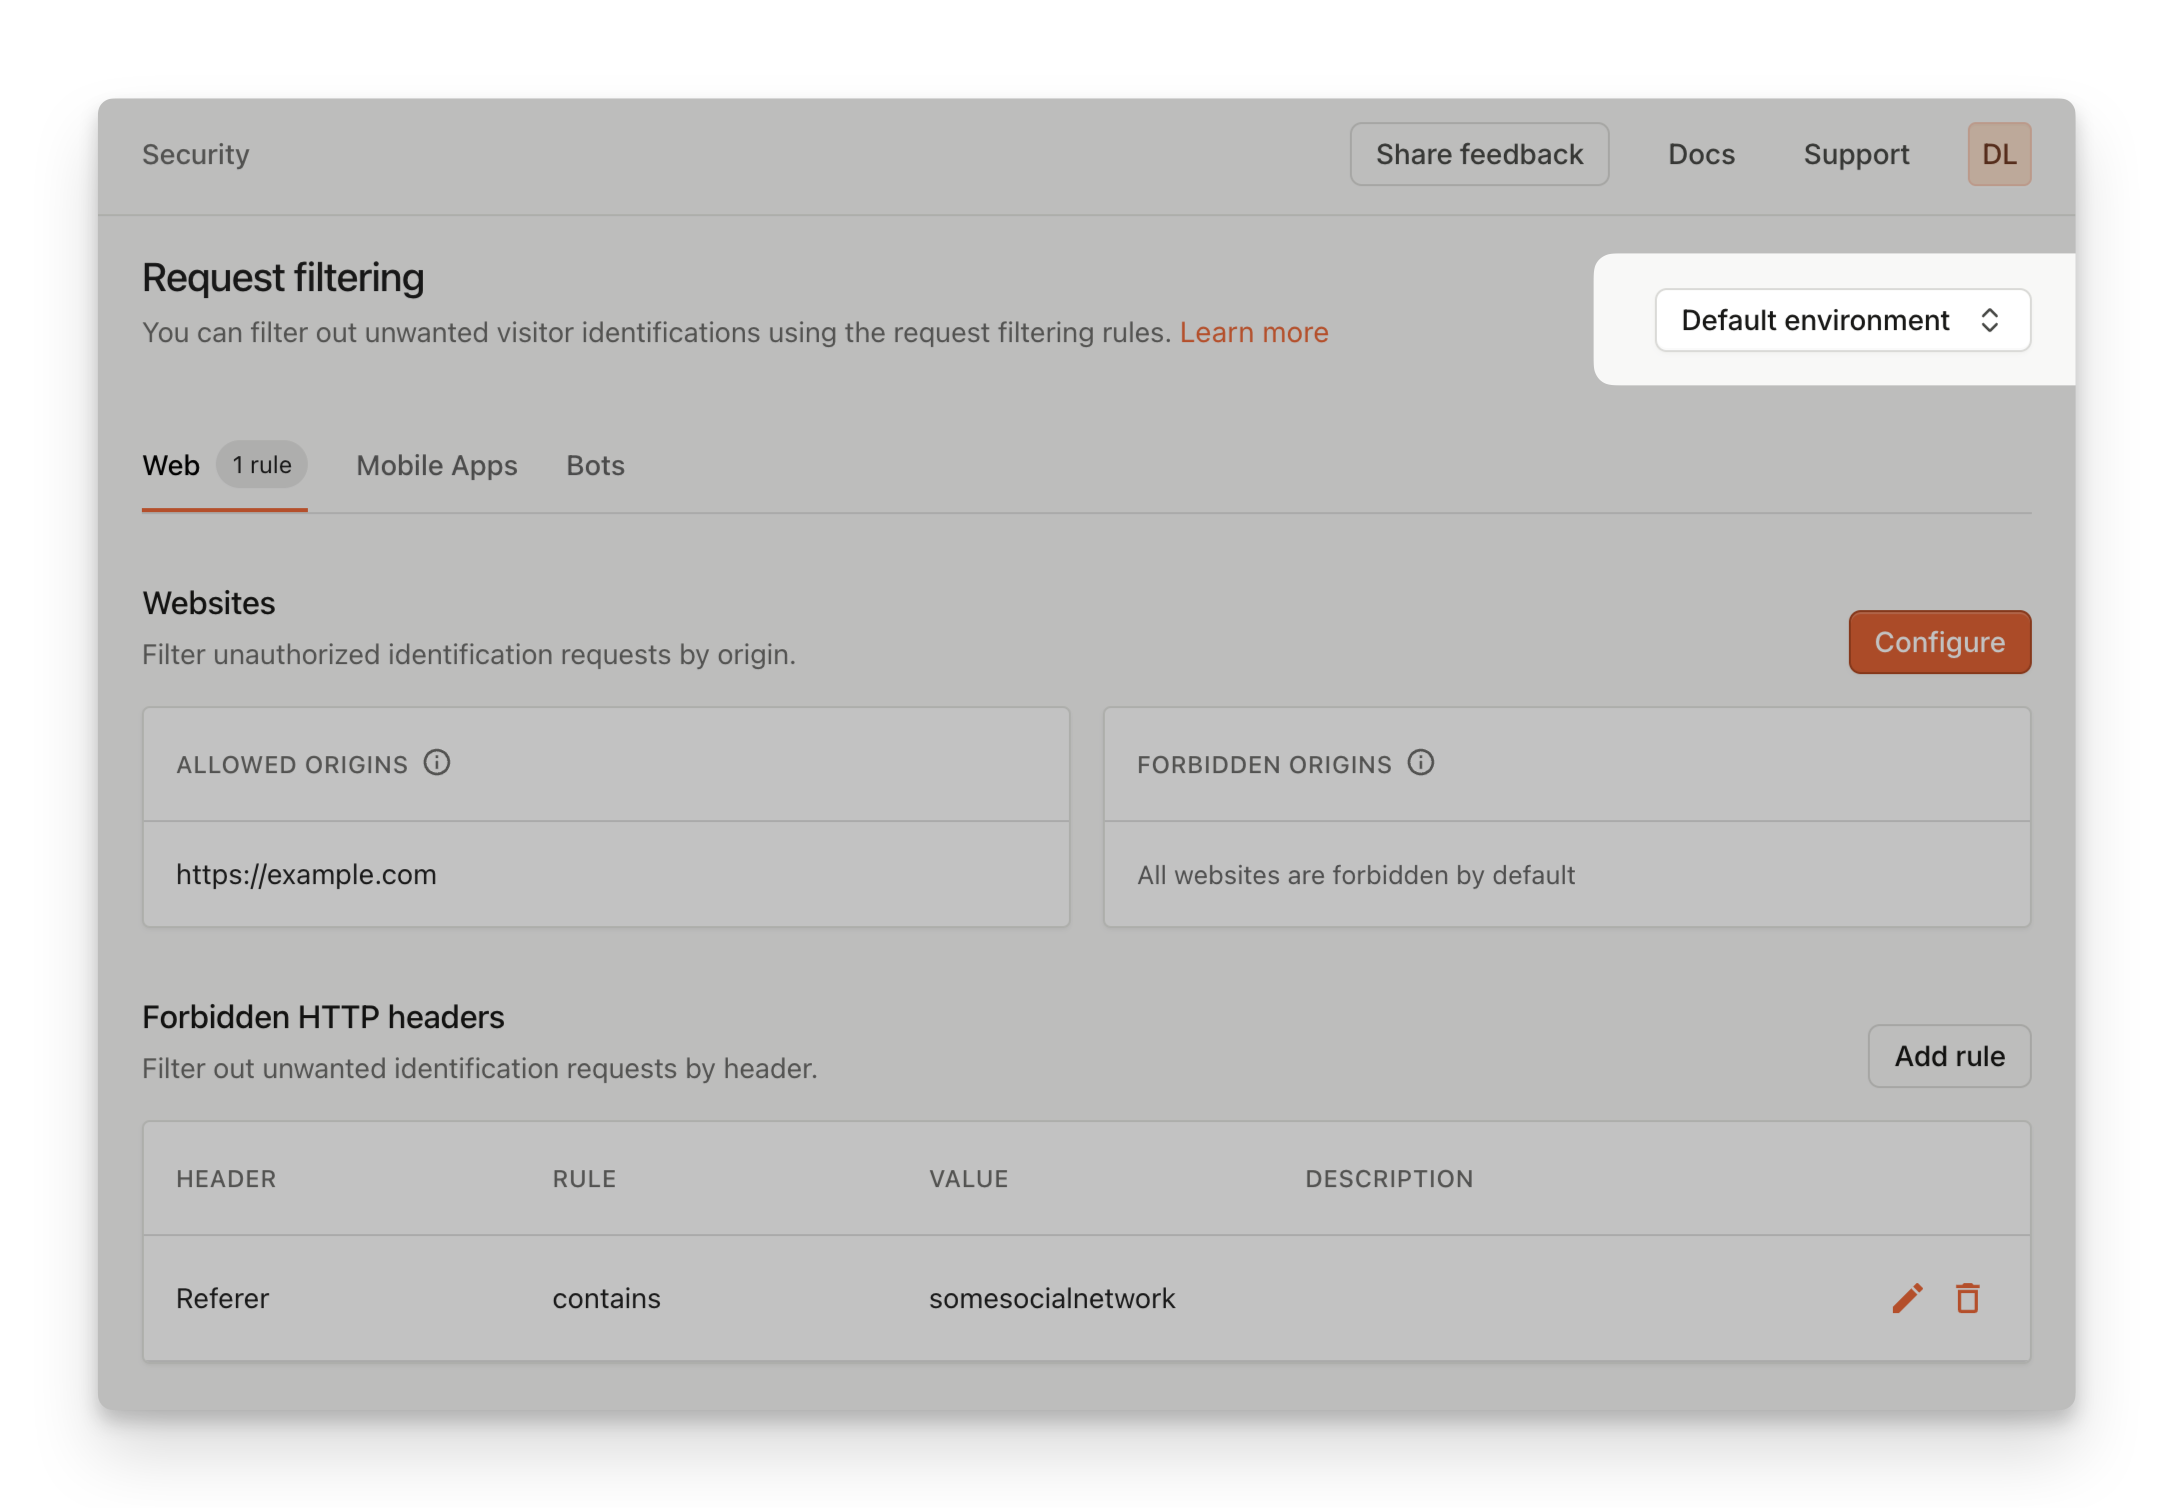
Request filtering
When setting up request filtering rules, you can assign them to a specific environment. In combination with API keys, you can create different request filtering rules for each environment, ensuring that you don’t accidentally allow traffic from unwanted origins.
To manage environment specific request filtering rules, go to Security. On top of the page, you can select the environment you're configuring filtering rules for.
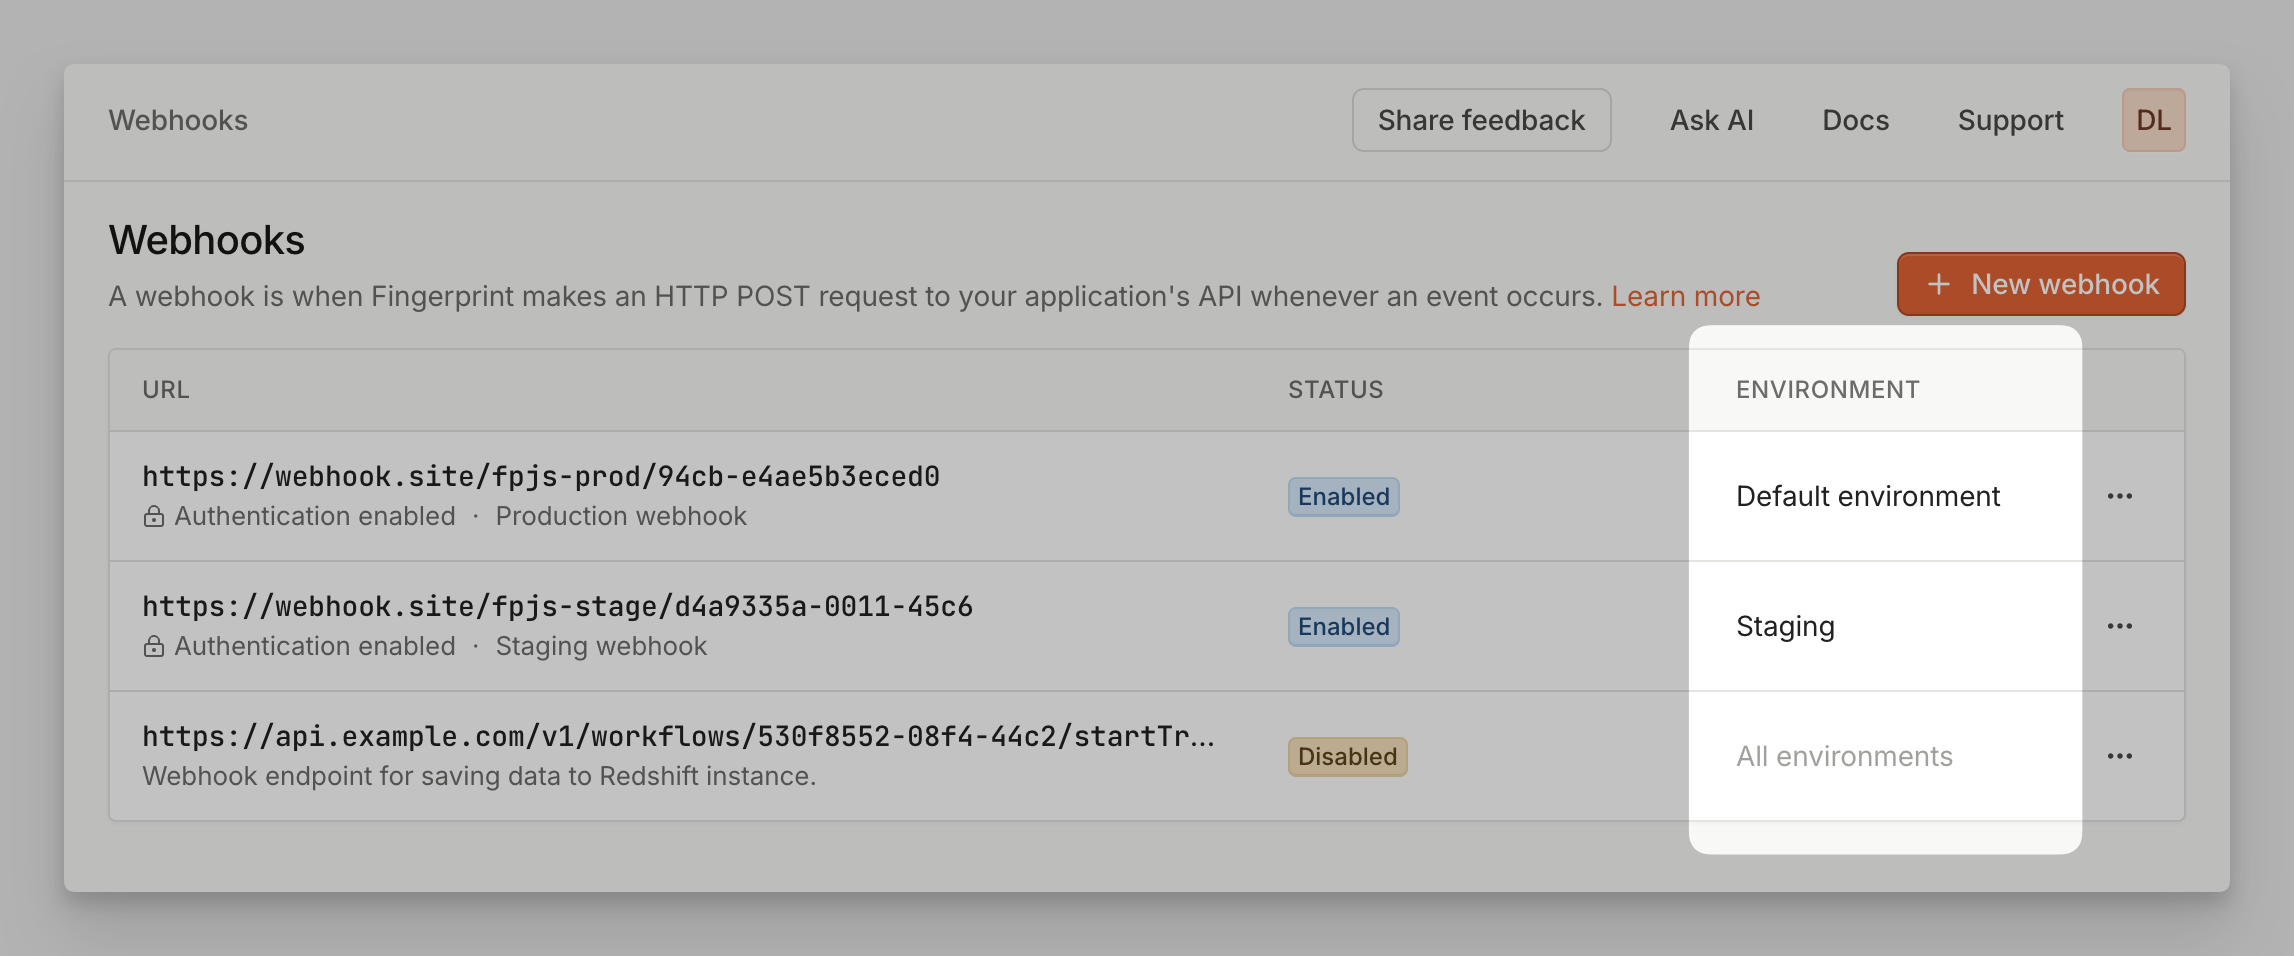
Webhooks
When creating webhooks, you can optionally limit their scope to a specific environment. An environment-scoped webhook will only report identification events from the matching environment. On the other hand, workspace-scoped webhook will report all identification events from the workspace.
To manage webhooks, go to Webhooks.
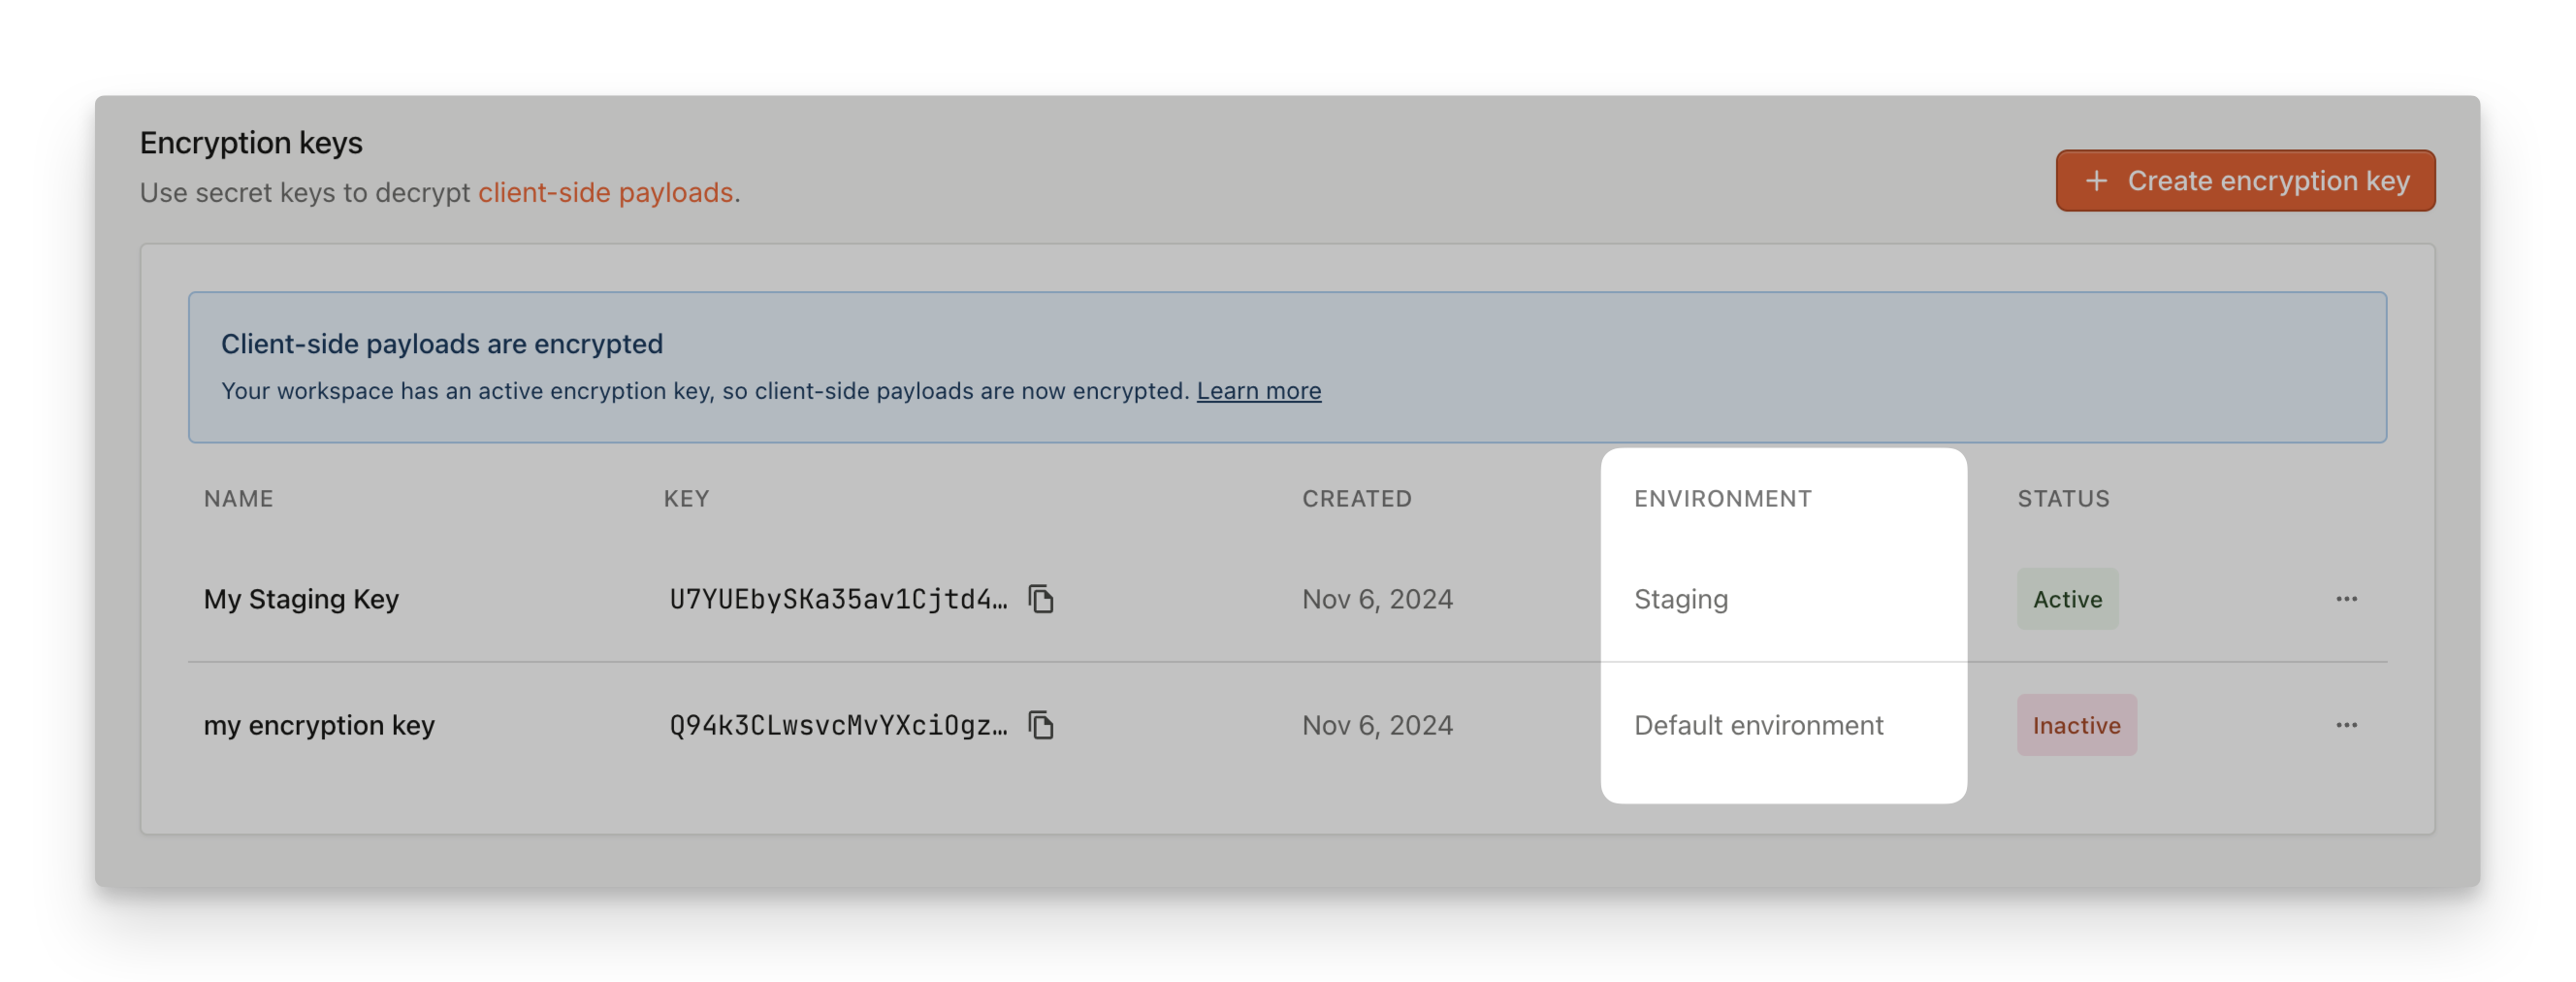
Sealed Client Results
When creating Encryption keys in order to enable Sealed Client Results, you can assign them to specific environment. This will result in client-side payload being encrypted for this particular environment. Other environments will remain unaffected and their payloads will not be encrypted.
To manage Encryption keys, go to API Keys and look for Encryption keys section.
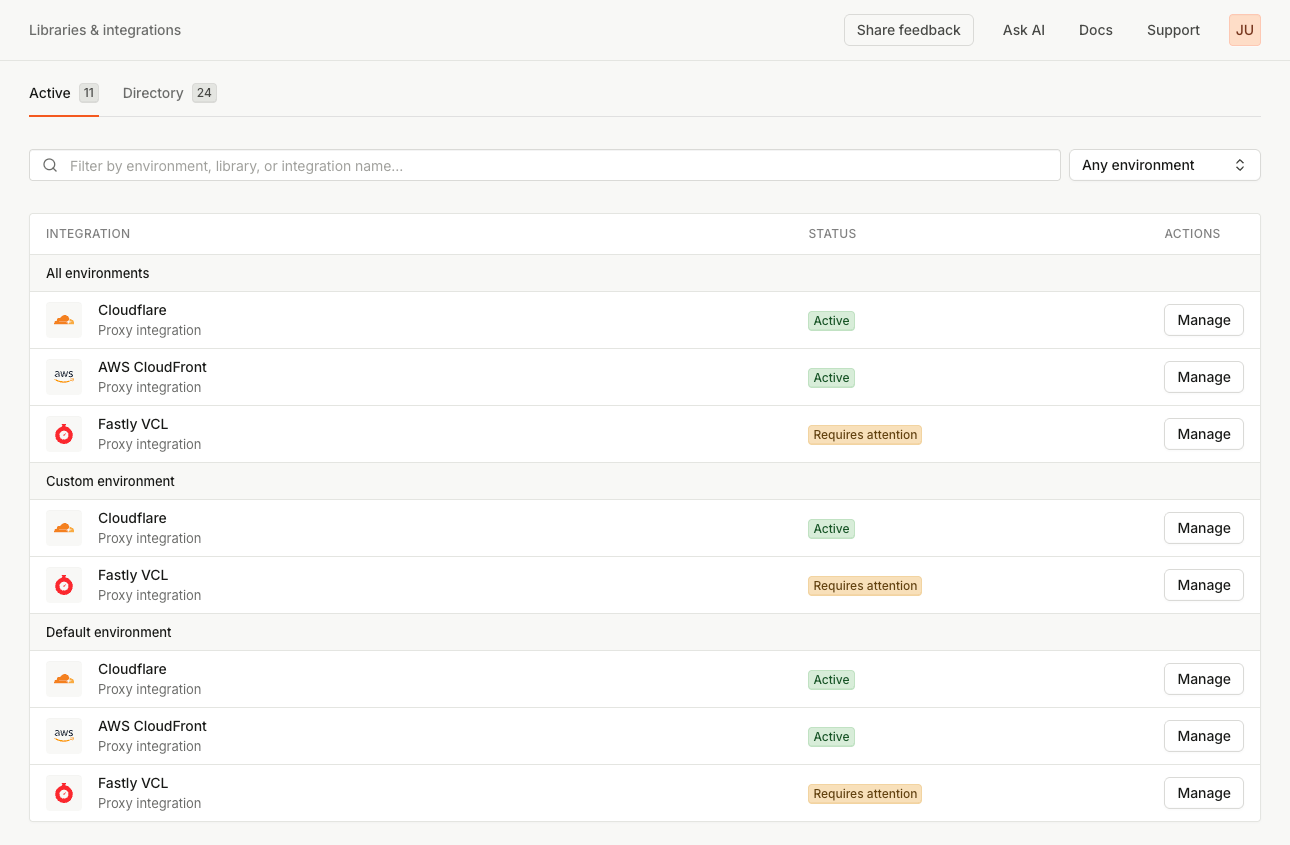
Proxy integrations and proxy secrets
Deploying a proxy integration requires creating a proxy secret to authenticate requests coming through the integration. You can create a proxy secret that works in all environments (workspace-scoped), or you can assign a proxy secret to a specific environment (environment-scoped).
If you create an environment-scoped proxy secret, the proxy integration will only work for identification requests made using a public API key from the same environment.
Recommended setups include:
- Using a single, workspace-scoped proxy integration (proxy secret) which can be used with all environments.
- For example, you can have one workspace-scoped AWS CloudFront integration used for both production and staging environments.
- This will appear in the Dashboard as a single "All environments" integration status page. Inside the status page, you can still filter request statistics by their public API key environment.
- Using multiple environment-scoped proxy integrations (proxy secrets), one for each environment.
- For example, if you maintain Fingerprint setups for multiple clients within your workspace, you can have environments like Client A, Client B, Client C and deploy a separate Cloudflare integration (proxy secret) for each environment.
- This will appear in the Dashboard as 3 separate integration status pages, one for each environment.
Limitations and best practicesWe recommend using one of the setups recommended above.
- Deploying one workspace-scoped and one environment-scoped integration of the same type (e.g., Cloudflare) is possible only to ease the transition from one setup to the other. Note that identification requests will show up on one or the other status page based on the proxy secret environment scope (not the public API key environment).
- We do not recommend using multiple integrations of the same type (e.g. multiple Fastly VCL integrations) in a single environment. That setup would make the integrations harder to monitor and troubleshoot. Requests from both integrations would have the same proxy secret environment, so they would be pooled to a single status page in the Dashboard.
- For proxy integrations managed through the Fingerprint Dashboard (Cloudflare and AWS CloudFront), you can only connect one Cloudflare/AWS CloudFront integration per environment and one workspace-scoped integration.
Updated 30 days ago