
Migrating CloudFront proxy integration from v1 to v2
This migration guide describes how to switch to Fingerprint Pro CloudFront integration v2 if you are currently running the first version. lt covers different ways to upgrade, including options with zero downtime and without the need to update the proxy path used by your client agent.
Improvements over v1
- More robust and secure auto-update mechanism: The v1 update mechanism, relying on CodePipeline and S3 triggers, was broken by AWS changes. The v2 update mechanism is based on Fingerprint sending authenticated HTTP requests to the integration's Management Lambda function. You manually provide the Management function URL and token to the Fingerprint dashboard. Fingerprint stores the token in encrypted form.
- Lower footprint and improved performance: By removing internal dependencies, the shipped Lambda function code has been reduced by 97% to 740 lines.
- Updated Node runtime: The v1 Lambda functions run on Node 16, which AWS is deprecating. The v2 Lambda functions run on Node 20.
When to use this guide
- This guide is for you if you need to update the proxy integration "in place" without changing any endpoint paths, using the original CloudFormation installation method.
- If you don't mind updating your client code to use the v2 integration on a different path (or a small downtime), it's easier to create a new integration from scratch using the regular CloudFront v2 proxy integration guide. You can install a new v2 integation using CloudFormation or Terraform.
- If you need to switch to using v2 on Terraform "in place" without changing any endpoint paths and with no downtime, please reach out to our support team.
Migration overview
- Install CloudFront integration v2 using the regular CloudFront v2 proxy integration guide. You will have v1 and v2 running in the same CloudFront distribution in parallel on different paths.
- Verify that the new integration works.
- Switch from v1 to v2 proxy integration.
- Optional: Remove the old integration using CloudFormation stack UI.
Step 1: Install CloudFront integration v2 on a new path
Follow all the steps of the full CloudFront v2 integration guide to deploy a v2 proxy integration on a new path:
- In Step 1, you can generate a new proxy secret in the Fingerprint dashboard or use the one you already have. You will find it in your AWS Secret Manager.
- In Step 2, use the same
FPJS_AGENT_DOWNLOAD_PATHandFPJS_GET_RESULT_PATHas your v1 proxy integration. - In Step 3.2, set the
DistributionIdto the identifier of your existing CloudFront distribution serving the v1 proxy integration. - In Step 4.1, create a new CloudFront origin, with the origin domain of
fpcdn.ioaccording to the guide, but name itfpcdn.io-v2to help distinguish it from the existing origin. - In Step 4.2, create a new behavior according to the guide.
- Use the
fpcdn.io-v2origin from the previous step - Make sure to pick the v2 cache policy you just created, not the old one.
- Set the path pattern to a different value than your existing proxy integration. For example, if the v1 integration is available on
FPJS_BEHAVIOR_PATHset the path pattern toFPJS_BEHAVIOR_PATH_v2.
- Use the
- In Step 5, update your JS agent configuration only locally for now, and test the integration. We will discuss deployment further down in this guide.
- Don't forget to connect the integration to your Dashboard according to Step 6.
Step 2: Verify that the integration works
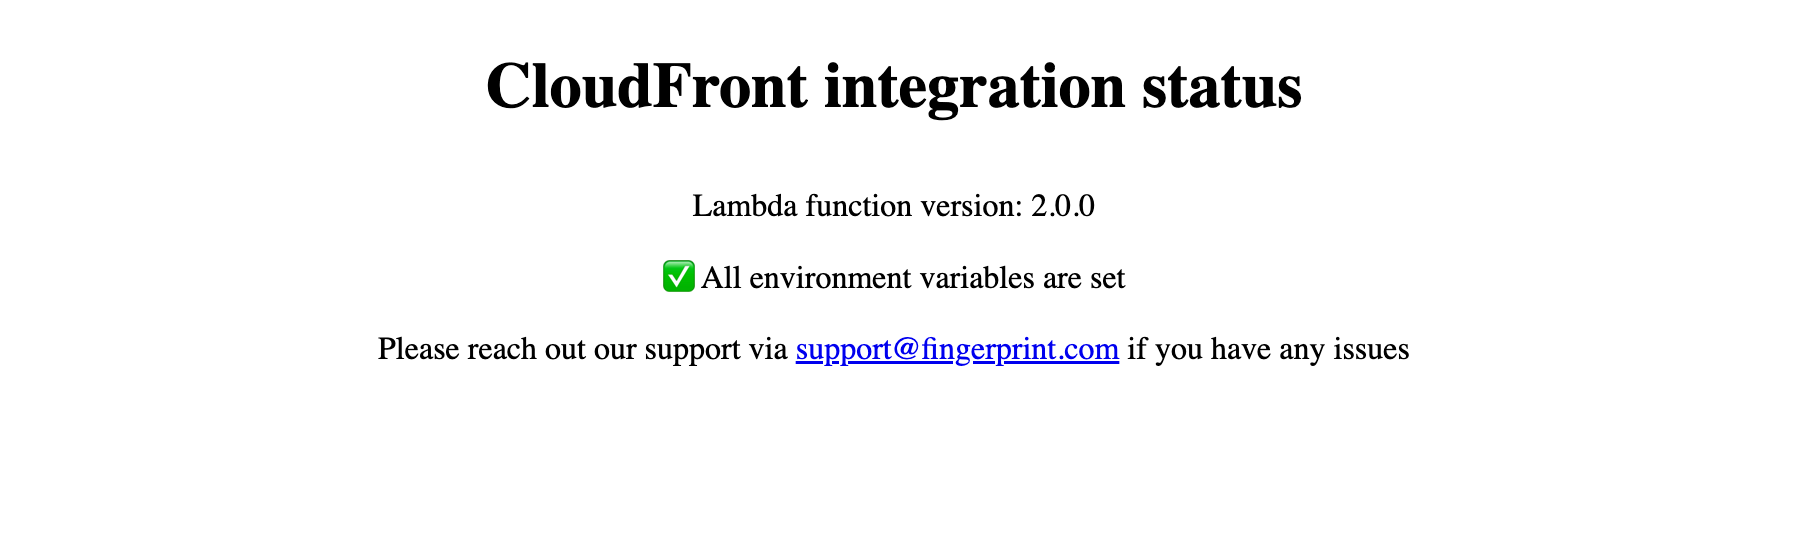
At this point, you should have both v1 and v2 integration running side by side. You can go to their respective status pages to confirm:
yourwebsite.com/FPJS_BEHAVIOR_PATH/statusshould display a status page of CloudFront integration v1.x.yourwebsite.com/FPJS_BEHAVIOR_PATH_v2/statusshould display a status page of CloudFront integration v2.x.
Try using the v2 integration with your client agent to test the integration. For example:
import * as FingerprintJS from '@fingerprintjs/fingerprintjs-pro'

// Initialize the agent at application startup.
const fpPromise = FingerprintJS.load({
  apiKey: 'PUBLIC_API_KEY',
  scriptUrlPattern: [
-   'https://yourwebsite.com/FPJS_BEHAVIOR_PATH/FPJS_AGENT_DOWNLOAD_PATH?apiKey=<apiKey>&version=<version>&loaderVersion=<loaderVersion>',
+   'https://yourwebsite.com/FPJS_BEHAVIOR_PATH_v2/FPJS_AGENT_DOWNLOAD_PATH?apiKey=<apiKey>&version=<version>&loaderVersion=<loaderVersion>',
    FingerprintJS.defaultScriptUrlPattern, // Fallback to default CDN in case of error
  ],
  endpoint: [
-   'https://yourwebsite.com/FPJS_BEHAVIOR_PATH/FPJS_GET_RESULT_PATH?region=us',
+   'https://yourwebsite.com/FPJS_BEHAVIOR_PATH_2/FPJS_GET_RESULT_PATH?region=us',
    FingerprintJS.defaultEndpoint // Fallback to default endpoint in case of error
  ],
});
All requests from the agent should go through v2 and resolve successfully. Confirm by using the Network tab in your browser Developer tools, as the JS agent can fall back to default endpoints in case of an integration error.
Step 3: Switch from v1 to v2
There are several ways to do this. Choose the one that suits you best depending on your deployment options and downtime tolerance.
Alternative A) Update your client agent to use the v2 proxy path (recommended)
The recommended approach is to update your client agent to use the v2 integration on the new path, as shown in the previous step.
- It is a simple and transparent change.
- It doesn't cause any downtime.
- Both integrations remain fully operational, making it easy to roll back in case of any problems.
- If you are using our NPM package or client library, you can even use the v1 integration as a fallback for v2:
import * as FingerprintJS from '@fingerprintjs/fingerprintjs-pro'

// Initialize the agent at application startup.
const fpPromise = FingerprintJS.load({
  apiKey: 'PUBLIC_API_KEY',
  scriptUrlPattern: [
+  'https://yourwebsite.com/FPJS_BEHAVIOR_PATH_v2/FPJS_AGENT_DOWNLOAD_PATH?apiKey=<apiKey>&version=<version>&loaderVersion=<loaderVersion>',
   'https://yourwebsite.com/FPJS_BEHAVIOR_PATH/FPJS_AGENT_DOWNLOAD_PATH?apiKey=<apiKey>&version=<version>&loaderVersion=<loaderVersion>',
    FingerprintJS.defaultScriptUrlPattern, // Fallback to default CDN in case of error
  ],
  endpoint: [
+   'https://yourwebsite.com/FPJS_BEHAVIOR_PATH_v2/FPJS_GET_RESULT_PATH?region=us',
    'https://yourwebsite.com/FPJS_BEHAVIOR_PATH/FPJS_GET_RESULT_PATH?region=us',
    FingerprintJS.defaultEndpoint // Fallback to default endpoint in case of error
  ],
});
But it is possible you cannot change the integration path or easily update your client-side code. For example, if you use the proxy integration in a mobile application, it might take a while for all your users to upgrade.
In that case, you can update the proxy integration "in place" without touching the client code and changing endpoint paths. See alternative B to reroute your v1 path to the v2 proxy integration.
Alternative B) Update the existing v1 behavior to use the v2 Lambda function
If you can't update your client-side code and can't afford downtime, you can update your v1 proxy behavior configuration to match the v2 behavior configuration in the AWS CloudFront UI.
-
Go to your CloudFront distribution and switch to the Behaviors tab.
-
Select the v1 behavior and click Edit.
-
In another tab, select the v2 behavior and click Edit. Put the tabs side by side for easier navigation.
-
Set the v1 behavior Origin to the origin used by the v2 behavior (
fpcdn.io-v2).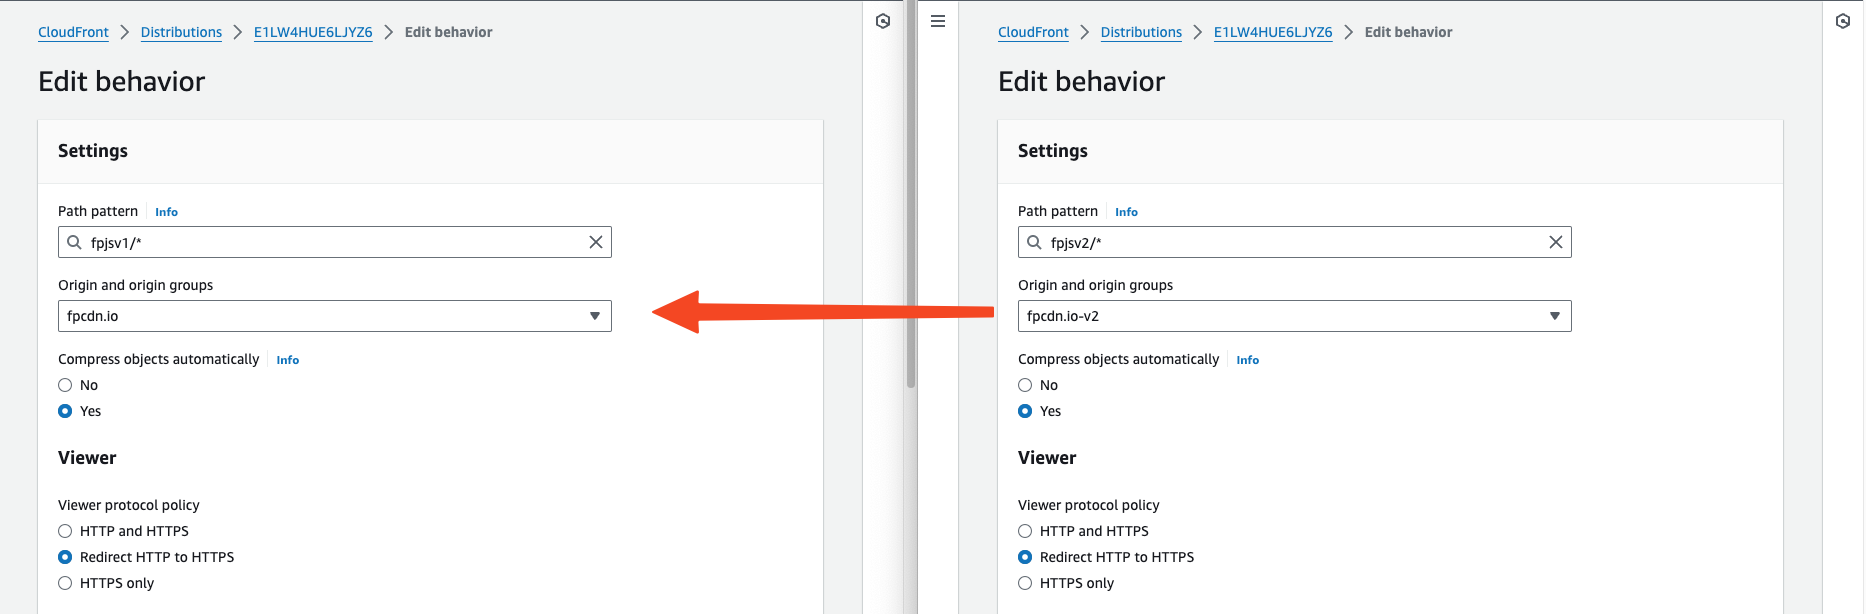
-
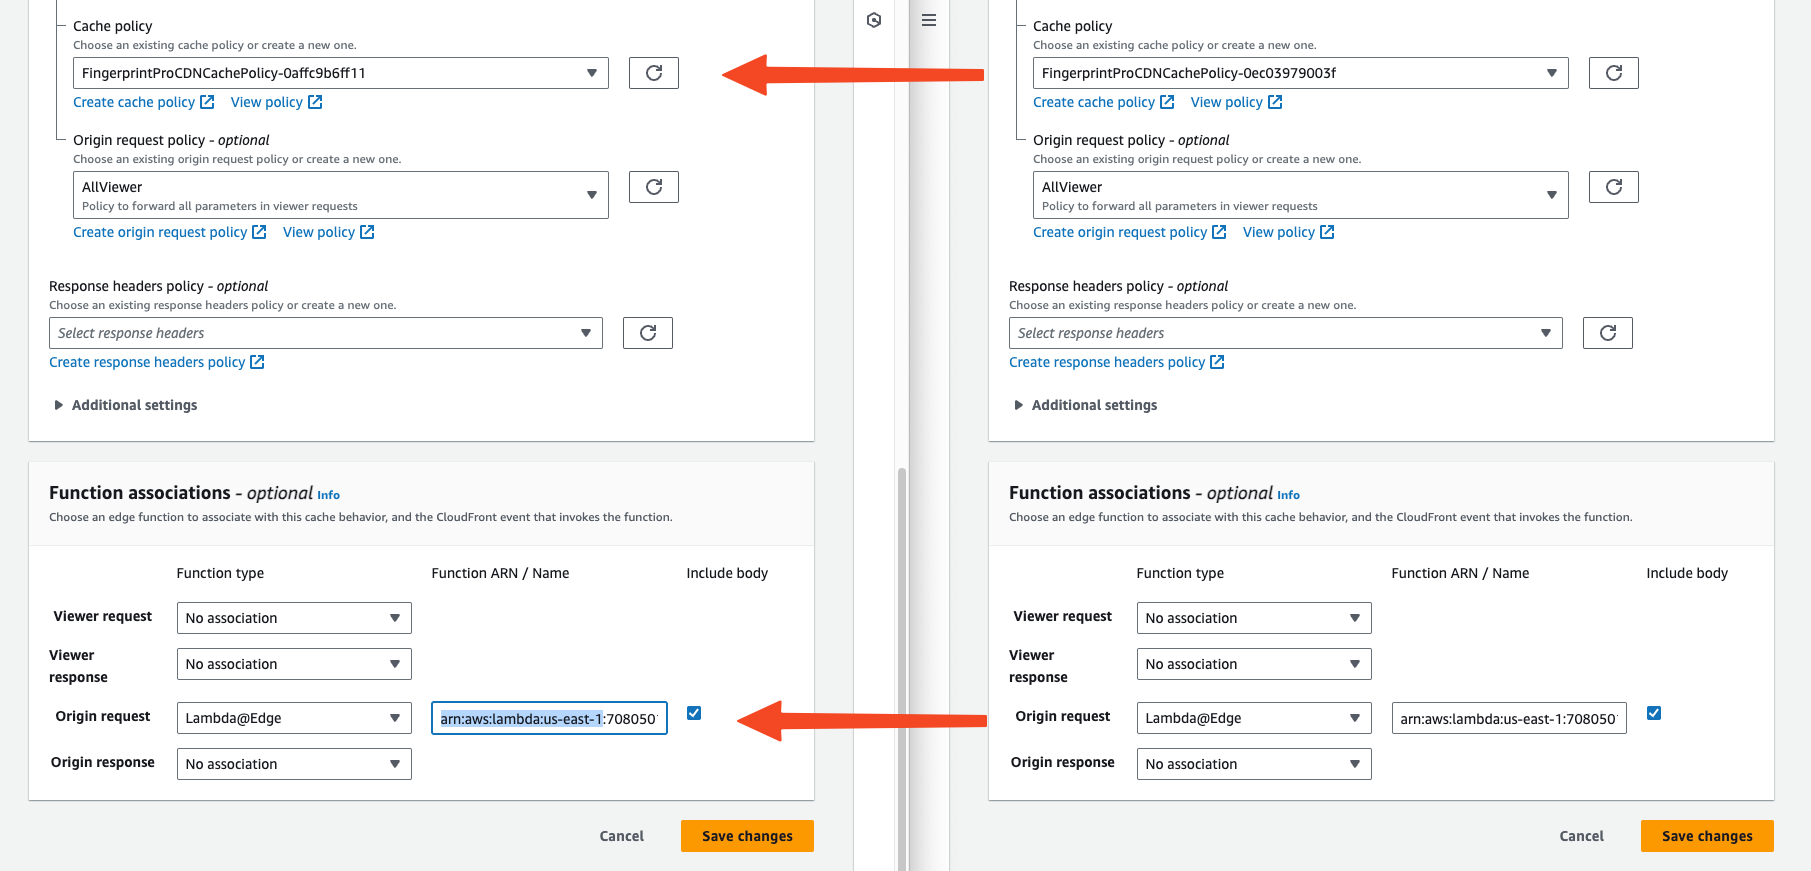
Set the v1 behavior Cache policy to the policy used by the v2 behavior.
-
In the Function associations section, find the Origin request row
- Set the v1 behavior Function ARN / Name to the Lambda function ARN used by the v2 behavior.
-
Click Save changes.
Requests coming to the original v1 integration path are now being processed by the v2 Lambda proxy function. Updating the cache behavior may take up to several minutes. To monitor the progress, go to the General tab of your CloudFront distribution and check the Last modified time.
More ways to switch from v1 to v2There are other options to reroute your v1 path to the v2 proxy integration, with different trade-offs and requirements. As long you end up with the required configuration, feel free to pick the option most suitable for your setup. For example:
- If you don't mind some downtime, you can just delete your v1 behavior (or change its path) and then change the v2 behavior's path pattern to the original v1 behavior path.
- If you can swap CloudFront bahaviors using code, you can do the change above in a single update, without downtime.
Step 5: Remove the old integration
When all your client application agents use the new integration, you can remove the old integration.
- Go to AWS CloudFormation > Stacks
- Select the v1 application you deployed from the Serverless application repository when installing the v1 CloudFront integration. Its description will say Fingerprint Pro Lambda@Edge function for CloudFront integration..
- Click Delete and confirm.
Note: Sometimes stack deletion fails to remove the Lambda function because it takes time to remove replicas of this function from all AWS regions where the function was used. In that case, try again in a few hours. AWS doesn’t provide a possibility to check whether replicas are already released or not.
- Remove any no longer needed CloudFront behaviors, origins, and cache policies.
Updated about 1 month ago