Deploy Fastly Compute Proxy Integration Manually
Before you start: Read the general Fastly Compute guideThis document only covers deploying the Fingerprint Fastly Compute proxy integration using the Fastly web interface. It assumes you have already read the general Fastly Compute guide and completed the following steps:
- Step 1: You have issued a proxy secret in the Fingerprint Dashboard (
PROXY_SECRET).- Step 2: You have defined the path variables for the integration (
AGENT_SCRIPT_DOWNLOAD_PATH,GET_RESULT_PATH)If you want to use Terraform instead of the Fastly web interface to install the integration, see Deploy Fastly Compute using Terraform.
LimitationsThis integration is exclusively supported for customers on the Enterprise Plan. Other customers are encouraged to use Custom subdomain setup or Cloudflare Proxy Integration.
Step 3.1: Create a Compute Service
Create a Compute service in your Fastly account.
- Go to Fastly Compute services.
- Click Create service > Create an empty service.
- On the top of the page, click Options > Edit service name.
- Give it a name we will remember in the future, for example,
fingerprint-fastly-compute-proxy-integration, and click Apply.
Step 3.2: Add a domain to the service
To get the proxy integration’s accuracy benefits, we recommend using a subdomain of the website you want to use Fingerprint on, for example, metrics.yourwebsite.com.
To avoid ad blockers, do not use subdomains like fingerprint, fpjs, and other fingerprint-related terms.
- Inside the service configuration left-hand menu, click Domains.
- Input your domain for the proxy integration, for example,
metrics.yourwebsite.com. - Click Add to save changes.
Safari accuracy on non-Fastly websitesFor maximum accuracy, both your website and your proxy integration should be served by Fastly.
You can use the Fastly VCL proxy integration even if your website is not served by Fastly, but this setup will likely limit Safari cookie lifetime to 7 days, resulting in lower accuracy. Because your website and the proxy integration will likely have different IP ranges, Safari will apply the same cookie lifetime cap as for third-party CNAME cloaking. This is still an improvement over third-party cookies getting blocked entirely by Safari.
Step 3.3: Configure the service backends in Fastly
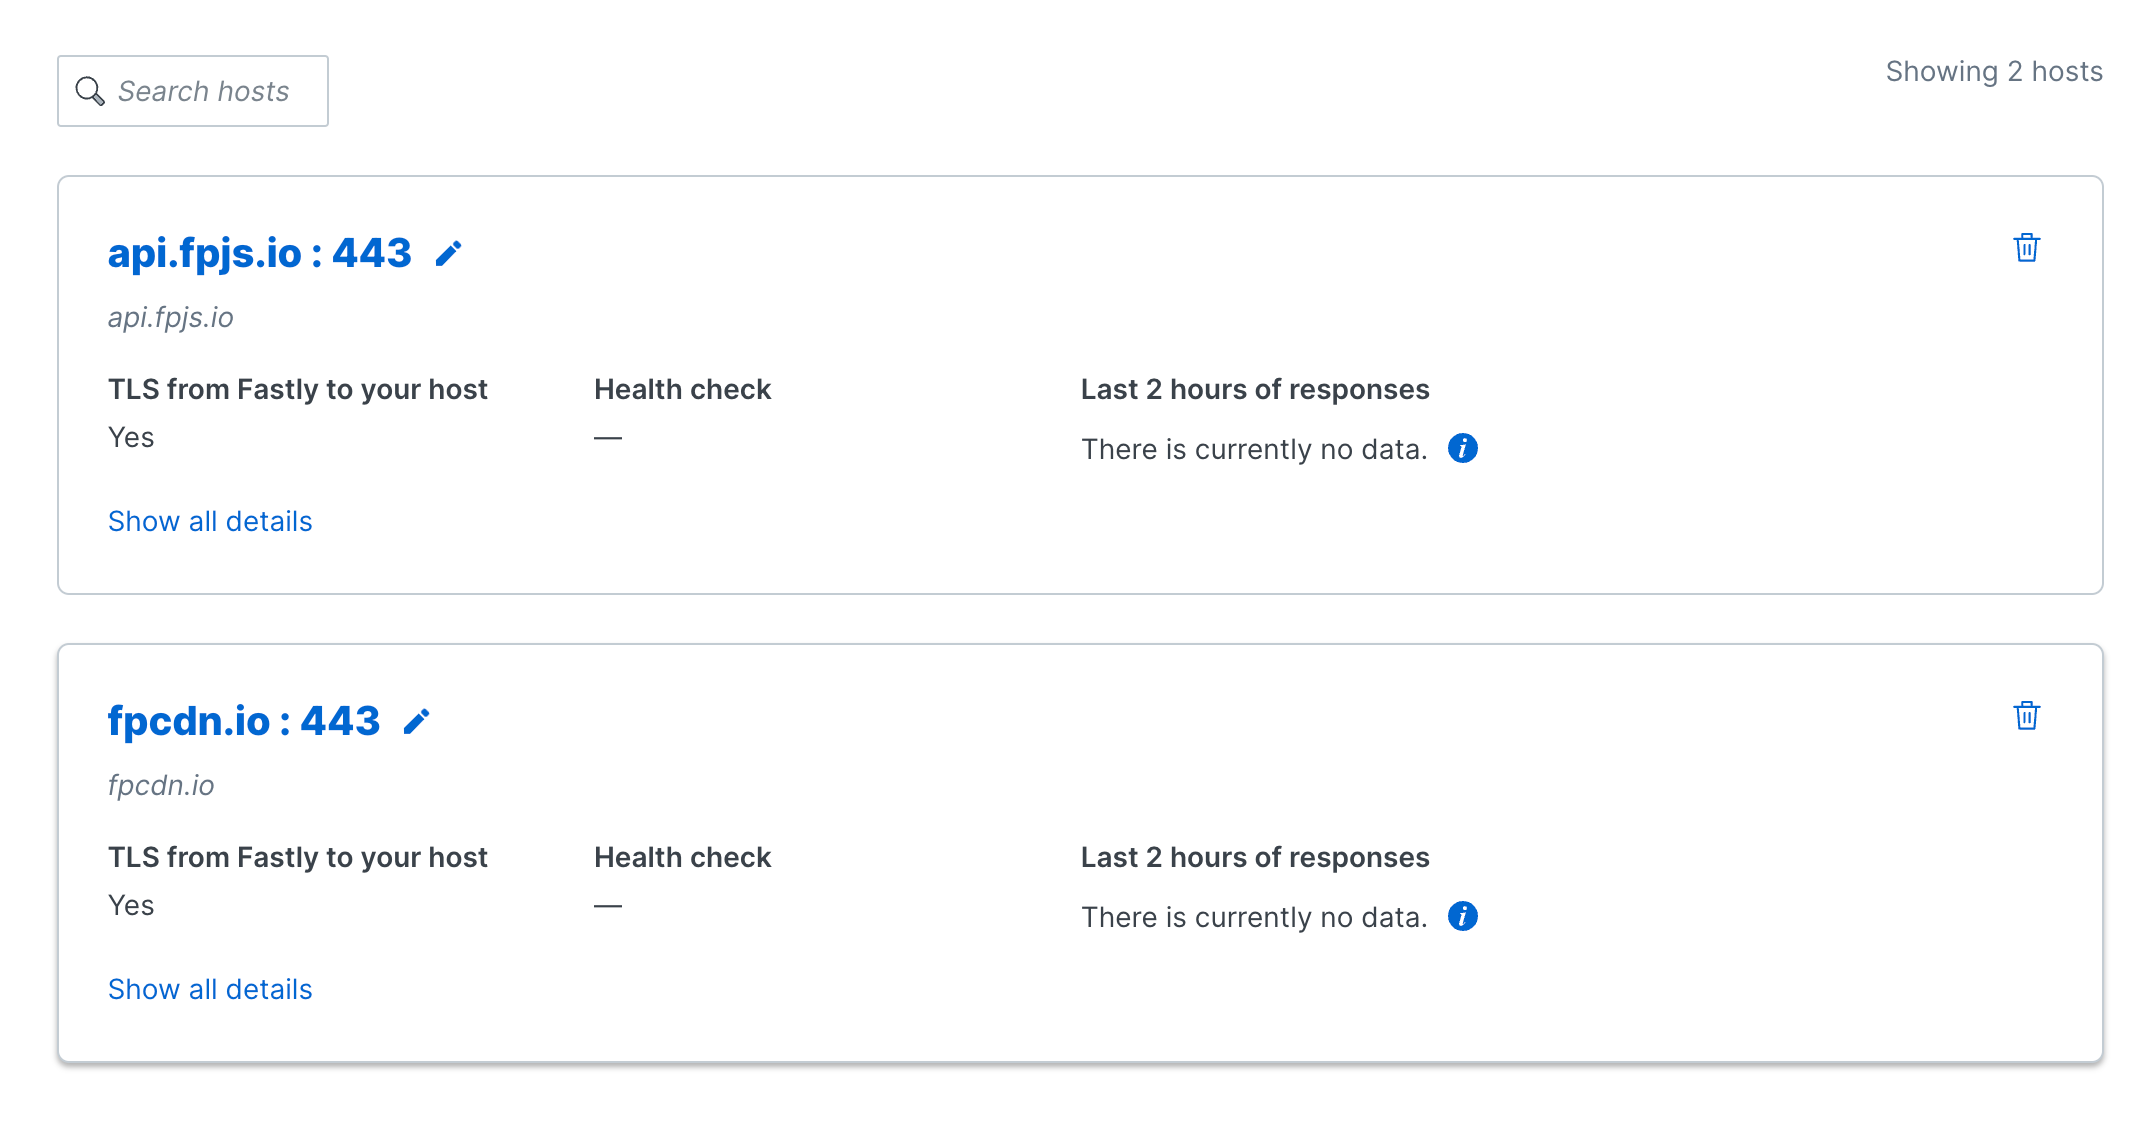
You need to add at least two backends to your Fastly service — Fingerprint CDN and the Fingerprint API.
Fingerprint API is available in three different regions: api.fpjs.io (Global), eu.api.fpjs.io (EU), and ap.api.fpjs.io (Asia). Use the right regional hostname depending on your Fingerprint workspace data region.
- Go back to Compute services and open the configuration of your service.
- Inside the service configuration left-hand menu, click Origins.
- First, create the Fingerprint CDN host. Under Hosts, type
fpcdn.io, and click Add. - Click Edit on the previously created host.
- Change its name to
fpcdn.io. Use the hostname exactly, the hostnames are hard-coded in the service code. - Scroll down and set Override host to
fpcdn.io. - Click Update to save changes.
- Change its name to
- Second, create the Fingerprint API host. Click Create a host, type
api.fpjs.io(or a regional equivalent), and click Add. - Click Edit on the previously created host.
- Change its name to
api.fpjs.io(or a regional equivalent). Use the hostname exactly, the hostnames are hard-coded in the service code. - Scroll down and set Override host to
api.fpjs.io(or a regional equivalent). - Click Update to save changes.
- Change its name to

Step 3.4: Add a config store to the service
Provide the proxy secret and your chosen resource paths to the service.
- In Fastly, navigate to Resources > Config stores.
- Click Create a config store.
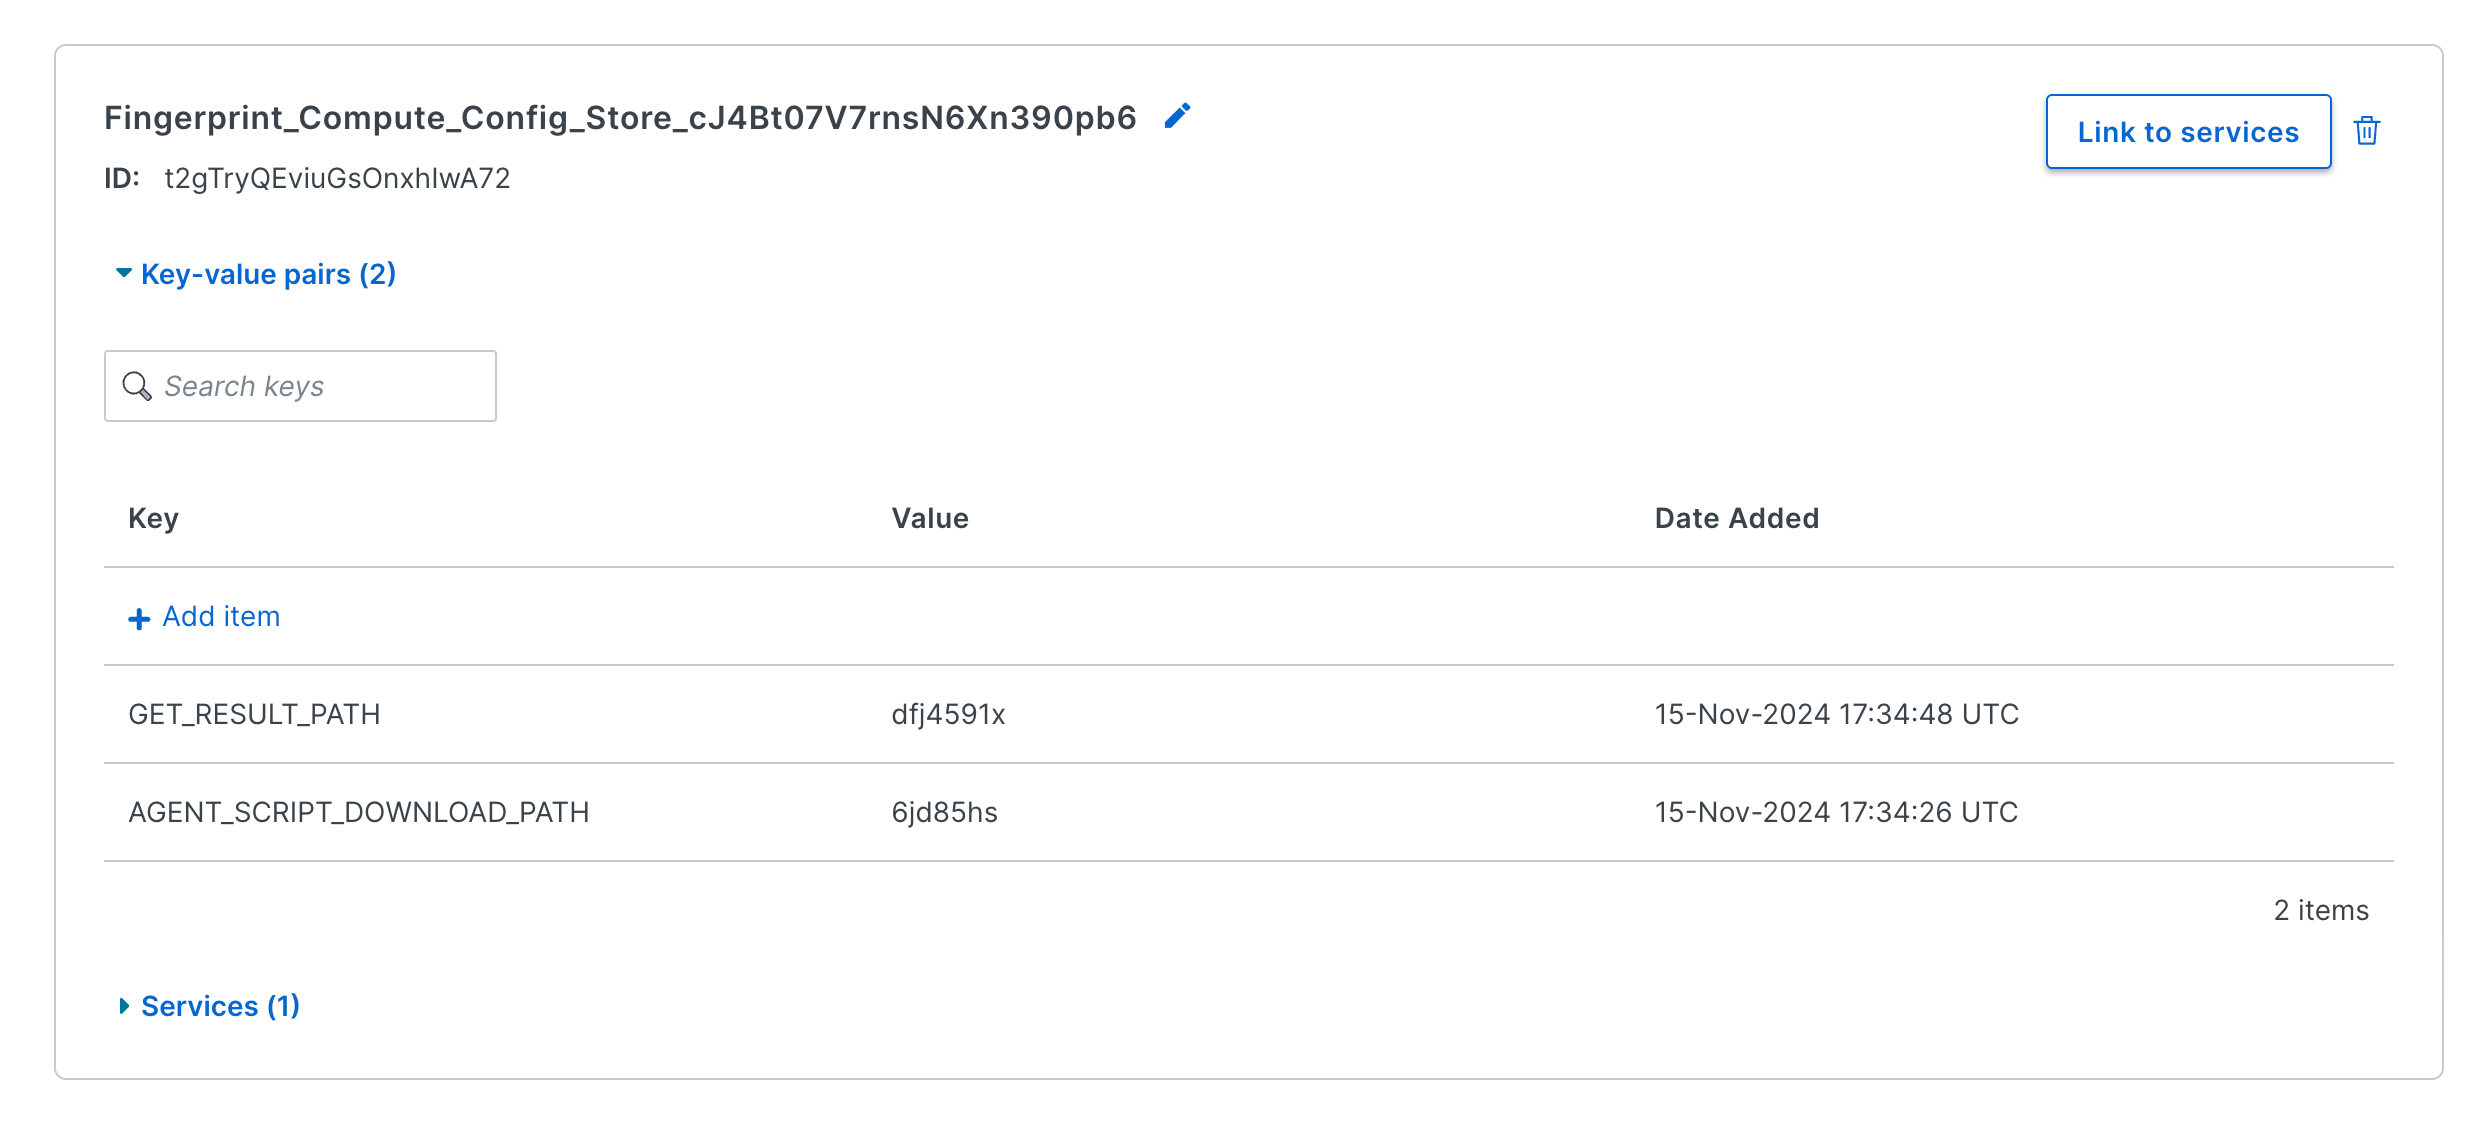
- Name the config store
Fingerprint_Compute_Config_Store_<SERVICE_ID>, where the suffix is your proxy integration's Compute Service ID. Make sure you don't have any spaces in the Config store name after copy-pasting your service ID. - Click Add.
- In the Linked Services tab, click on Link Service button and select
fingerprint-fastly-compute-proxy-integration. - Click Next, select the current (draft) version of your service, and click Link only.
- Click Finish.
- Find your new config store and click Key-value pairs to add the following values:
- Set
AGENT_SCRIPT_DOWNLOAD_PATHto your chosen agent download path. It should be something random to avoid ad blockers, for example,463n7-d0wnl04d. - Set
GET_RESULT_PATHto your chosen identification result path. It should be something random to avoid ad blockers, for example,1d3n71f1c4710n-r35ul7.
- Set

Step 3.5: Add a secret store to the service
- In Fastly, navigate to Resources > Secret stores.
- Click Create a secret store.
- Name the config store
Fingerprint_Compute_Secret_Store_<SERVICE_ID>, where the suffix is your proxy integration's Compute Service ID. Make sure you don't have any spaces in the Secret store name after copy-pasting your service ID. - Click Add.
- In the Linked Services tab, click on Link Service and select
fingerprint-fastly-compute-proxy-integration. - Click Next, select the current (draft) version of your service, and click Link only.
- Click Finish.
- Find your new Secret store and click Key-value pairs.
- Click Add item and set
PROXY_SECRETto the proxy secret value you generated in Step 1.
Note: Proxy secret requiredProxied identification requests without a valid proxy secret will result in an authentication error and not receive identification results.
Step 3.6: Deploy the proxy package and activate your service
Deploy the proxy service code to your Fastly Compute Service.
- Go to the latest release in the Fastly Compute Proxy Integration GitHub Repository.
- Download
fingerprint-fastly-compute-proxy-integration.tar.gzto your computer. - Inside Fastly, navigate to Compute > Compute services, open your proxy integration service, and switch to the Service configuration tab.
- In the left-hand menu, click Package.
- Upload the
fingerprint-fastly-compute-proxy-integration.tar.gzpackage. - Click Activate in the top right corner of the page (if you see Validating instead, wait for it to complete).
Wait a couple of minutes for the activation. You can go to metrics.yourwebsite.com/status to verify that your integration is running.
Step 3.7: Issue a TLS certificate for your subdomain
- Inside the Fastly Dashboard, navigate to Security > TLS Management > Domains.
- Click Secure domain or Secure another domain.
- Select Use certificates Fastly obtains for you.
- Enter your domain (for example
metrics.yourwebsite.com) and click Add. - Configure Certification Authority and TLS configuration according to your needs and click Submit.
- Follow the instructions on the screen to verify ownership of your domain. This usually involves creating a CNAME DNS record on your domain like
_acme-challenge.metrics.yourwebsite.com.
Give Fastly some time to verify the DNS record. Once verified, Fastly will issue a certificate for your domain and display a green Issued status.
Step 3.8: Point your subdomain to Fastly
Once your domain is verified and active, you need to choose the right hostname for your DNS record.
- Go to Security > TLS Management > Domains.
- Find your domain and under TLS configuration and DNS details, click View/Edit.
- The CNAME records section contains the value for your CNAME record, for example,
t.sni.global.fastly.net. - Add a subdomain CNAME recordto your domain's DNS and point it to the Fastly hostname from the previous step. For example:
metrics.yourwebsite.com. 3600 CNAME t.sni.global.fastly.net.
Step 4: Configure the client agent
Go back to the general Fastly Compute guide to Configure the Fingerprint client agent to use your service.
Updated about 1 month ago
