
Rules Engine (Beta)
Protect your application with rules based on Fingerprint device intelligence. Edit and store rules in Fingerprint without touching your application's code.
Feature in BetaThis feature is currently in an open Beta testing phase. We recommend testing it inside an isolated staging environment. All feedback is welcome! If you encounter any issues, please contact our support team.
Pre-requisites
- A Fingerprint account with an Admin role.
The Rules Engine allows you to define an event ruleset — a collection of rules evaluated against a Fingerprint identification event, including the Visitor ID and Smart signals.
For example, you might want to prevent browsers in incognito mode from creating accounts in your application:
- Open the Fingerprint Dashboard.
- Navigate to Rules Engine.
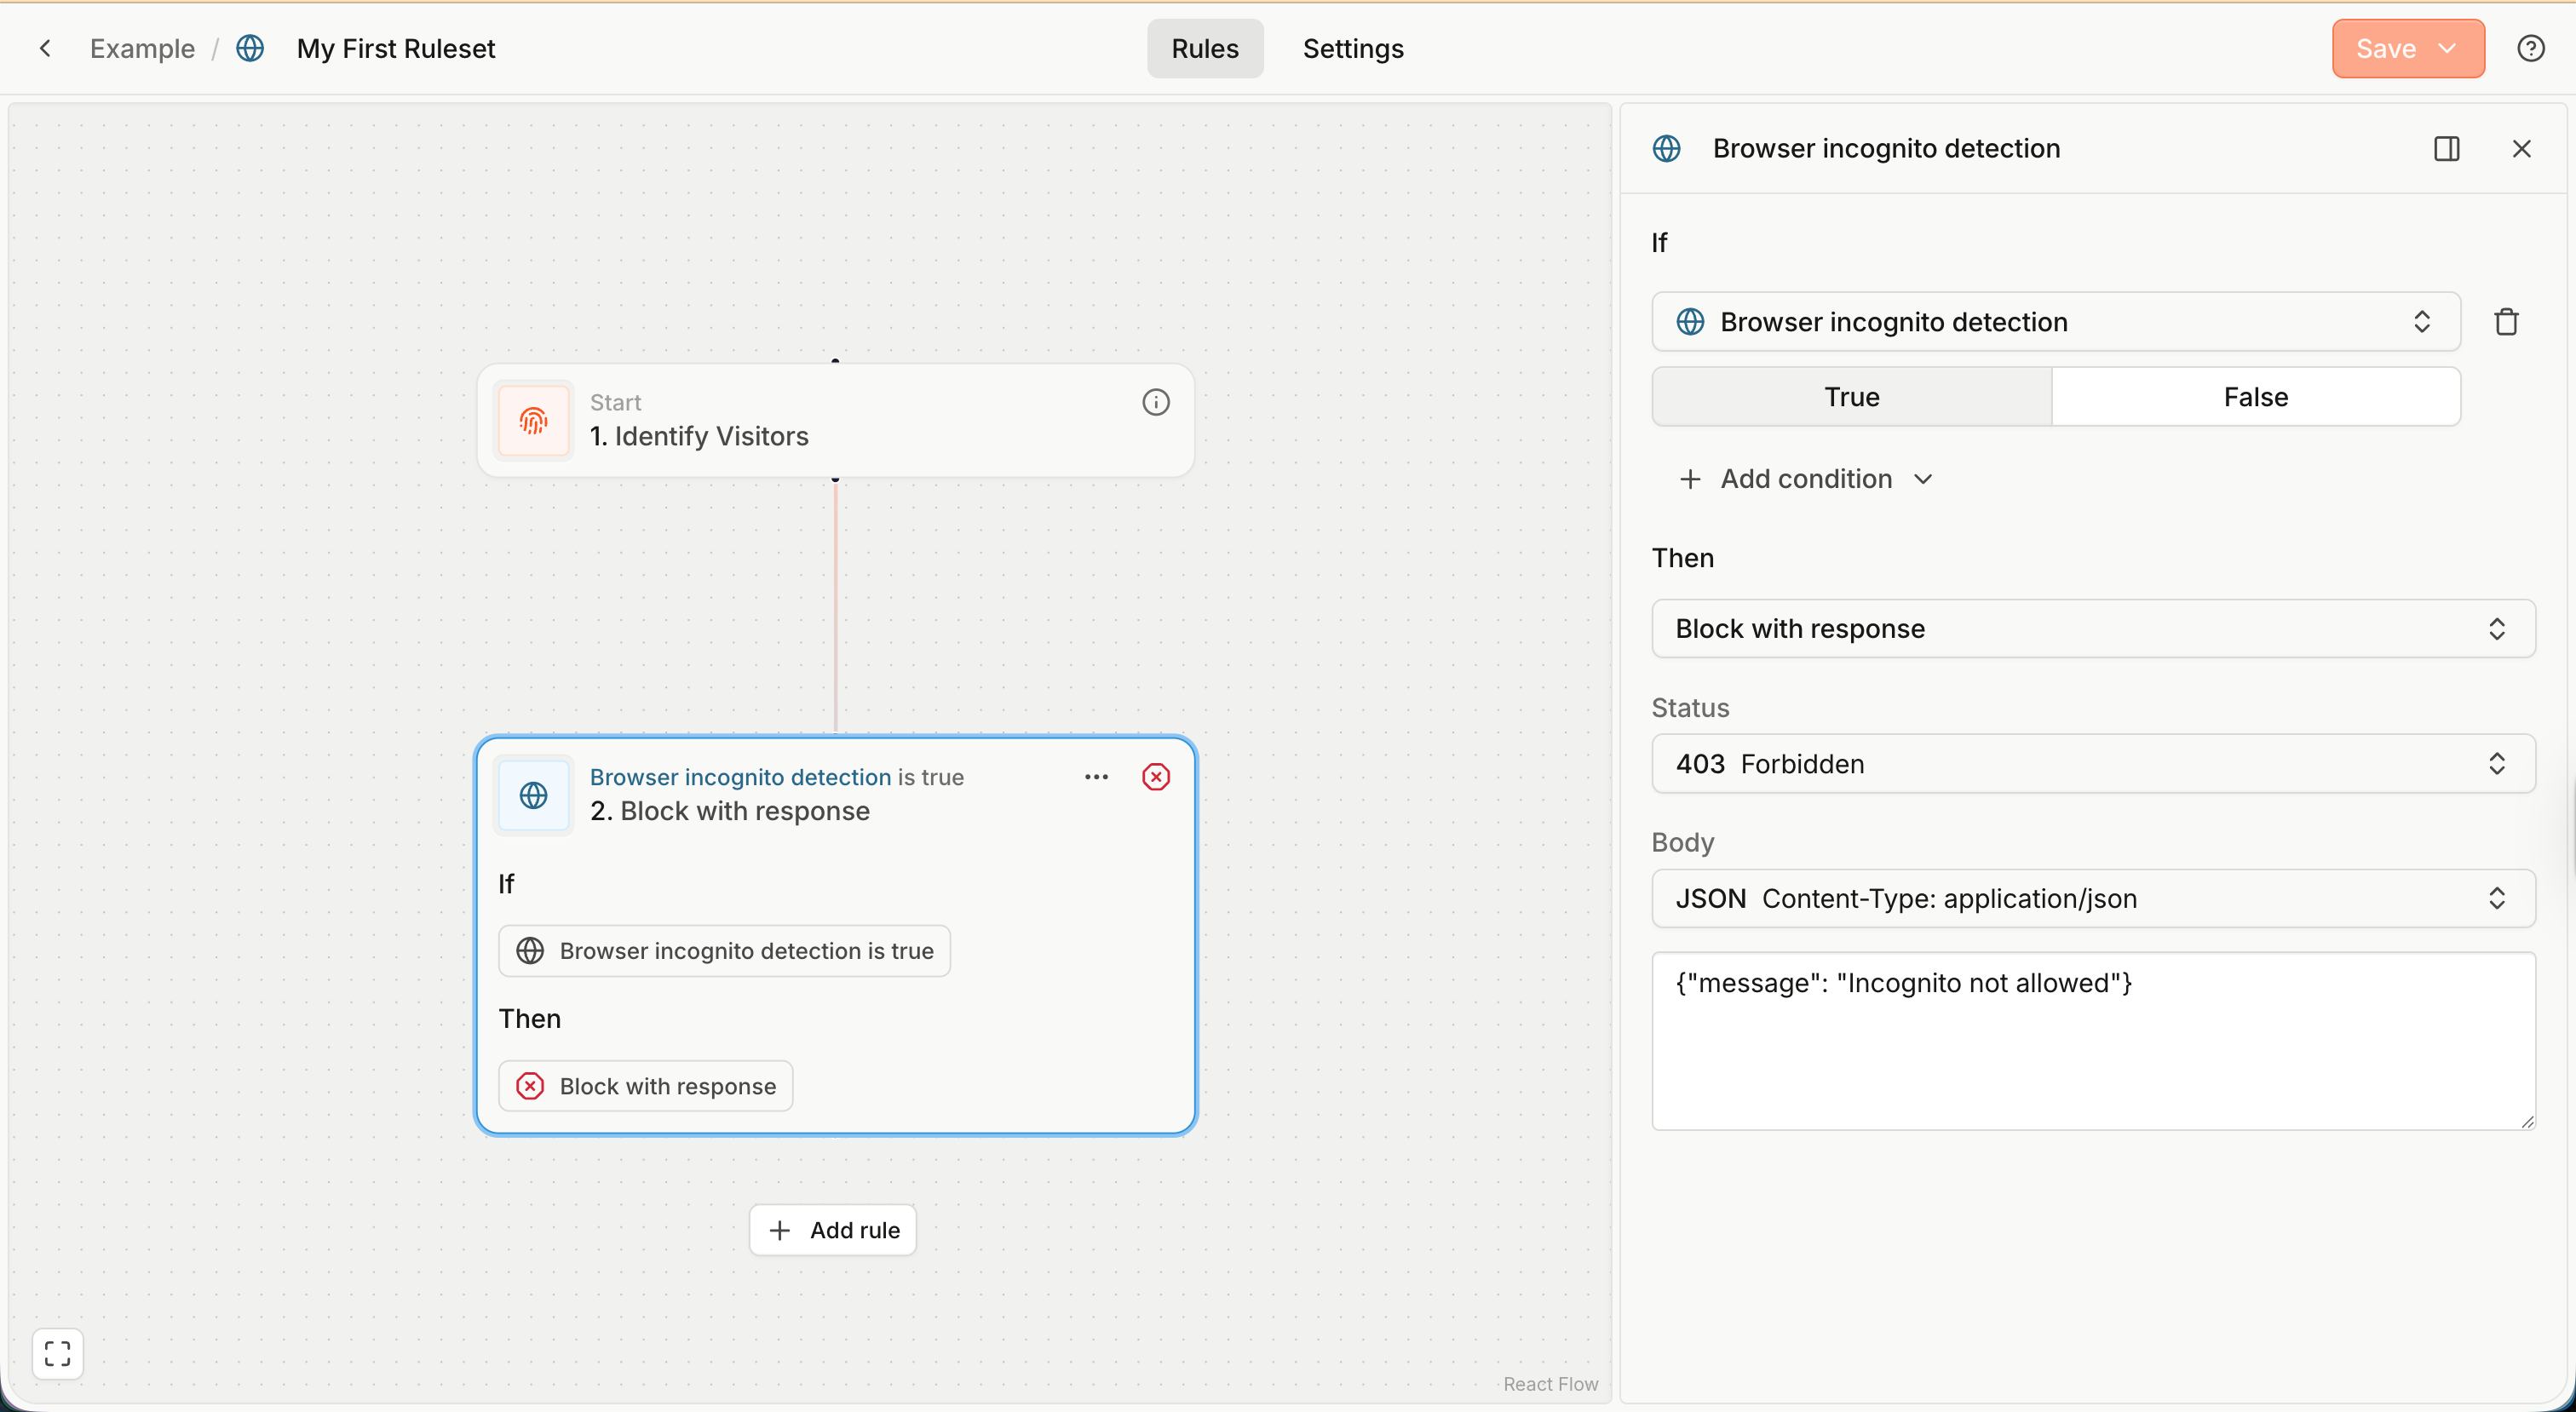
- Click + New ruleset. You will see a canvas with an initial "Identify visitors" node.
- Click + Add rule.
- Choose the Browser incognito detection Smart Signal as the rule condition.
- Click on the added rule to start editing it using the right-hand sidebar.
- Make sure the If Incognito condition is set to True.
- Optionally, in the Then section, adjust the Status or the Body of the response, for example
{"message": "Incognito not allowed"} - In the top right corner, click Save to save your changes.
The ruleset is saved right away, but it can take up to 60 seconds for the changes to propagate.
Keep learning about rulesets below, or just go straight to Using the ruleset.
Rule condition
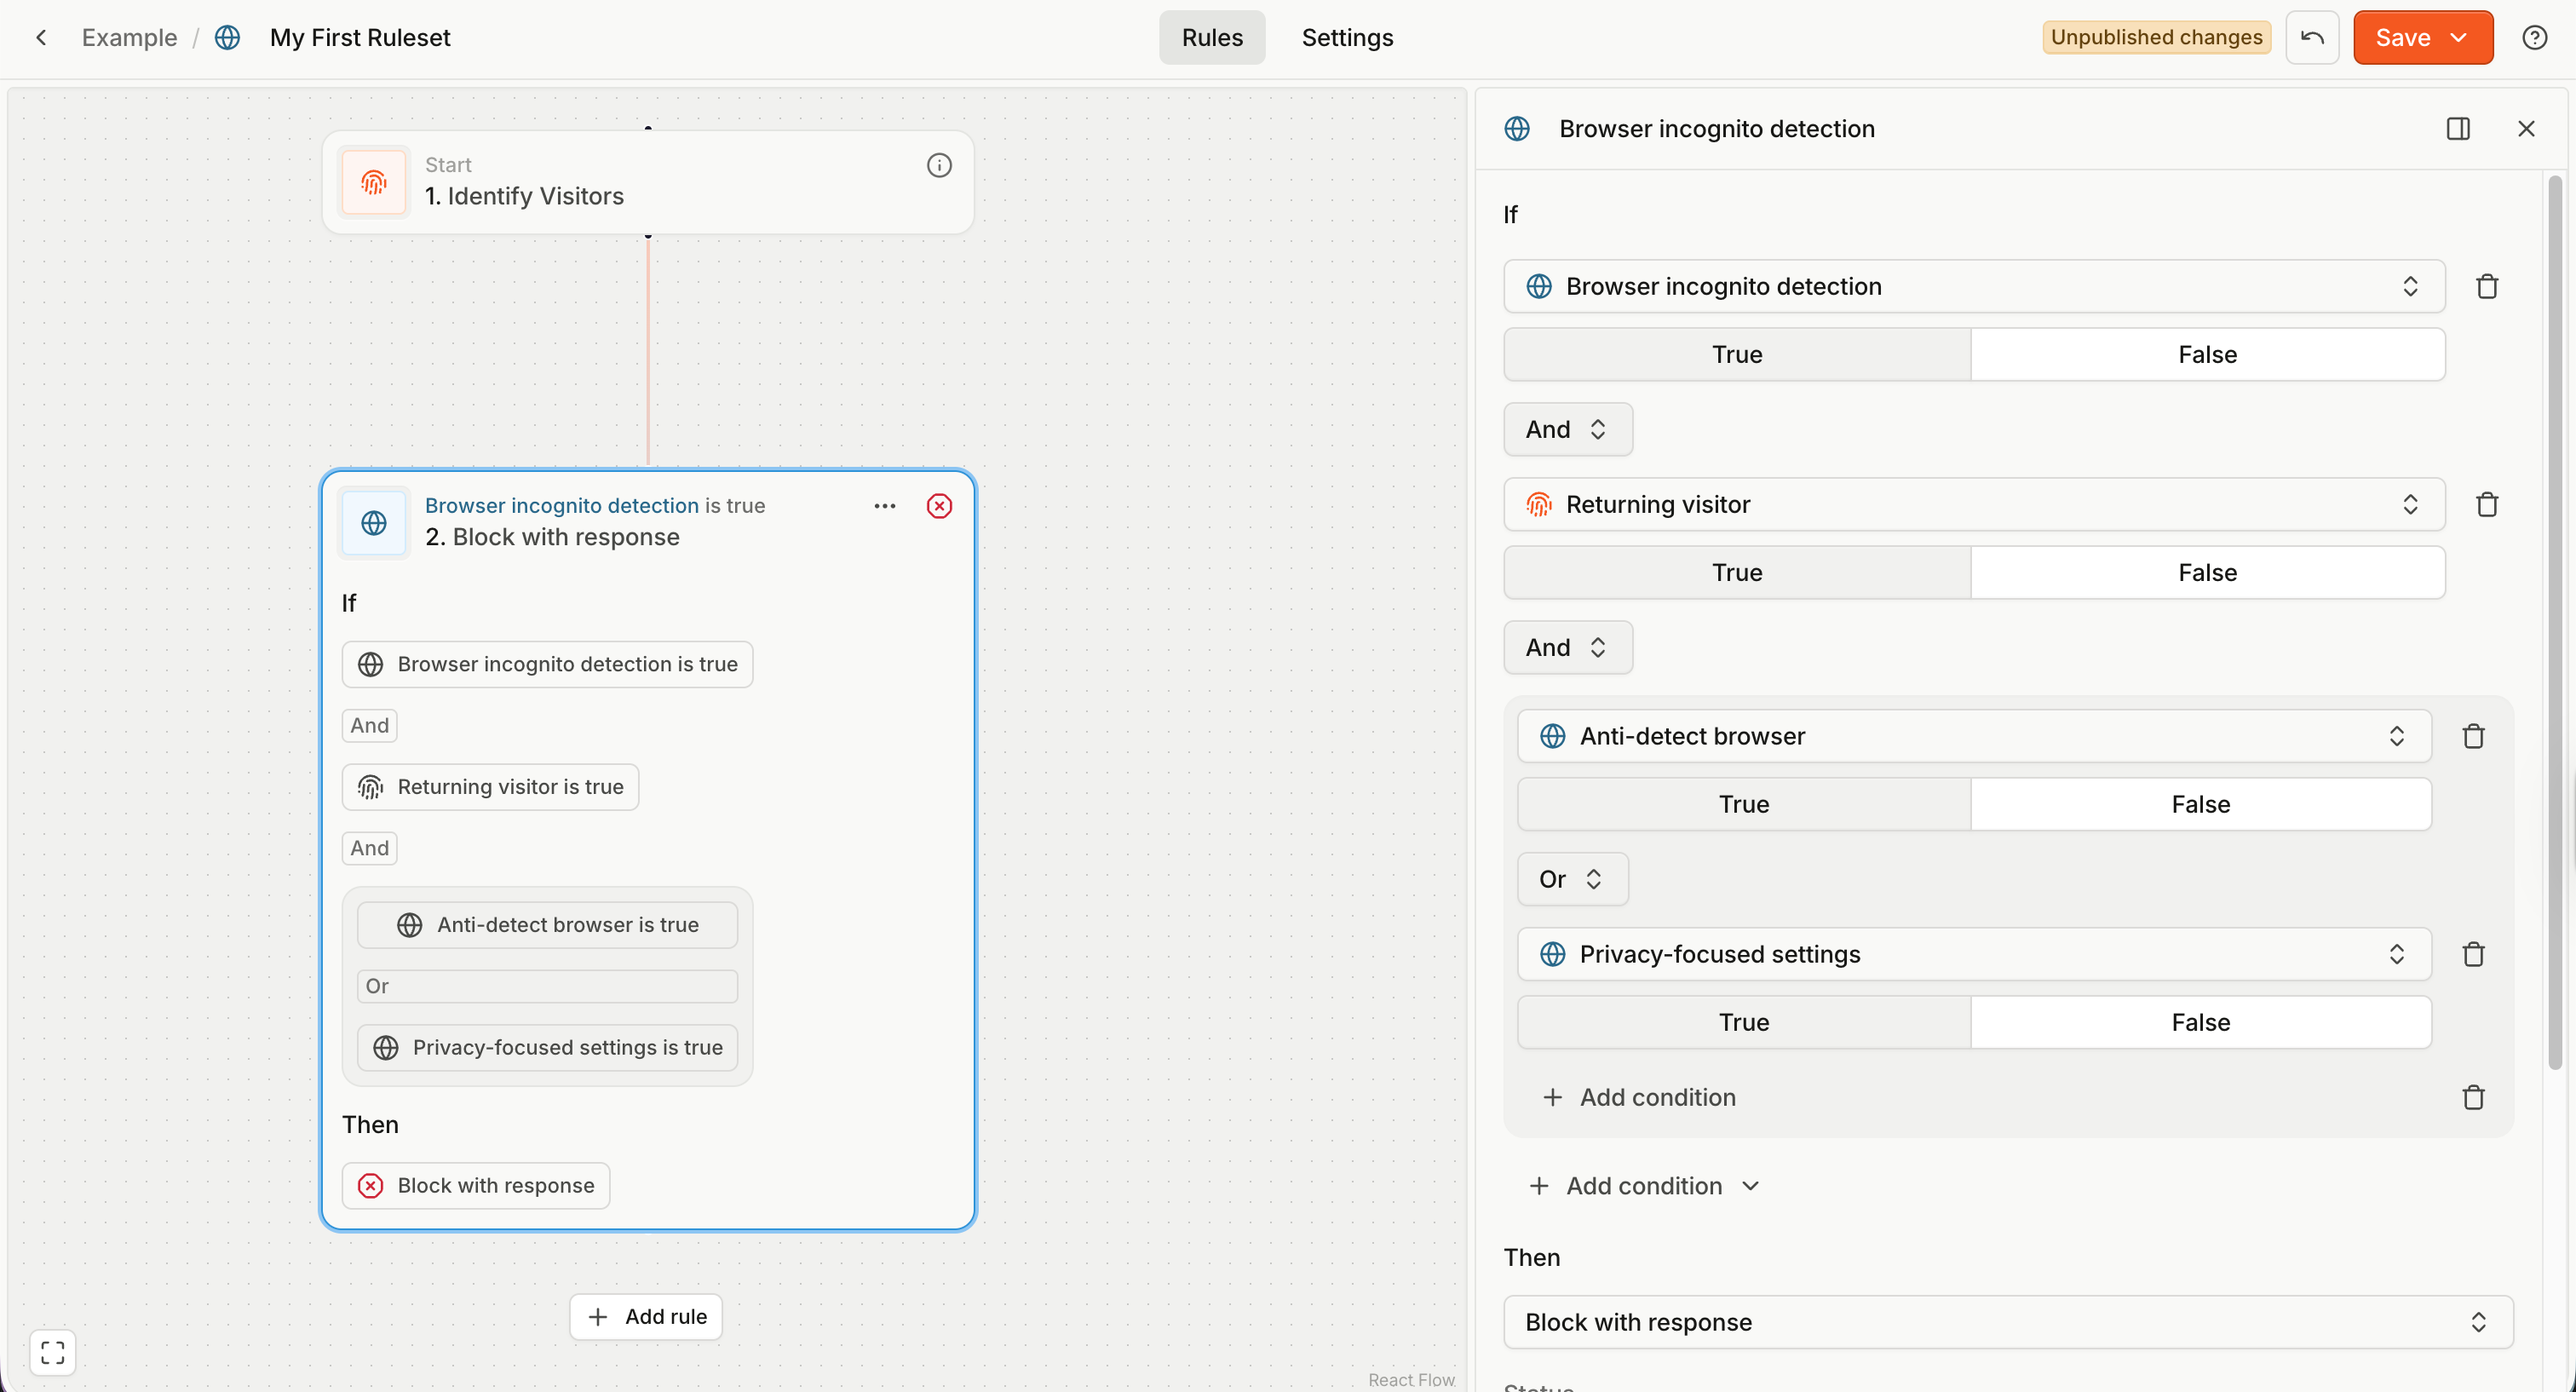
A rule condition is a logical expression like
IF VPN is TrueIF Suspect Score is greater than 10 AND IPv4 Country Code is CNIF Incognito Mode is True AND Returning visitor is True AND (Anti-Detect Browser is True OR Privacy-focused Settings is True)
The simplest condition is a single comparison (for example, VPN is True), consisting of the event property (VPN), operator (is) and value (True).
You can combine multiple comparisons using logical operators (AND and OR) and groups.
Note: To keep things simple, you must use the same logical operator between all comparisons within a group.
- You cannot represent a condition like
a AND b OR c.- But you can do
a AND b AND c,a OR b OR c,a AND (b OR c).
Rule name
A rule name is generated based on the initial comparison property. You can rename rules by clicking the name at the top of the rule form sidebar.
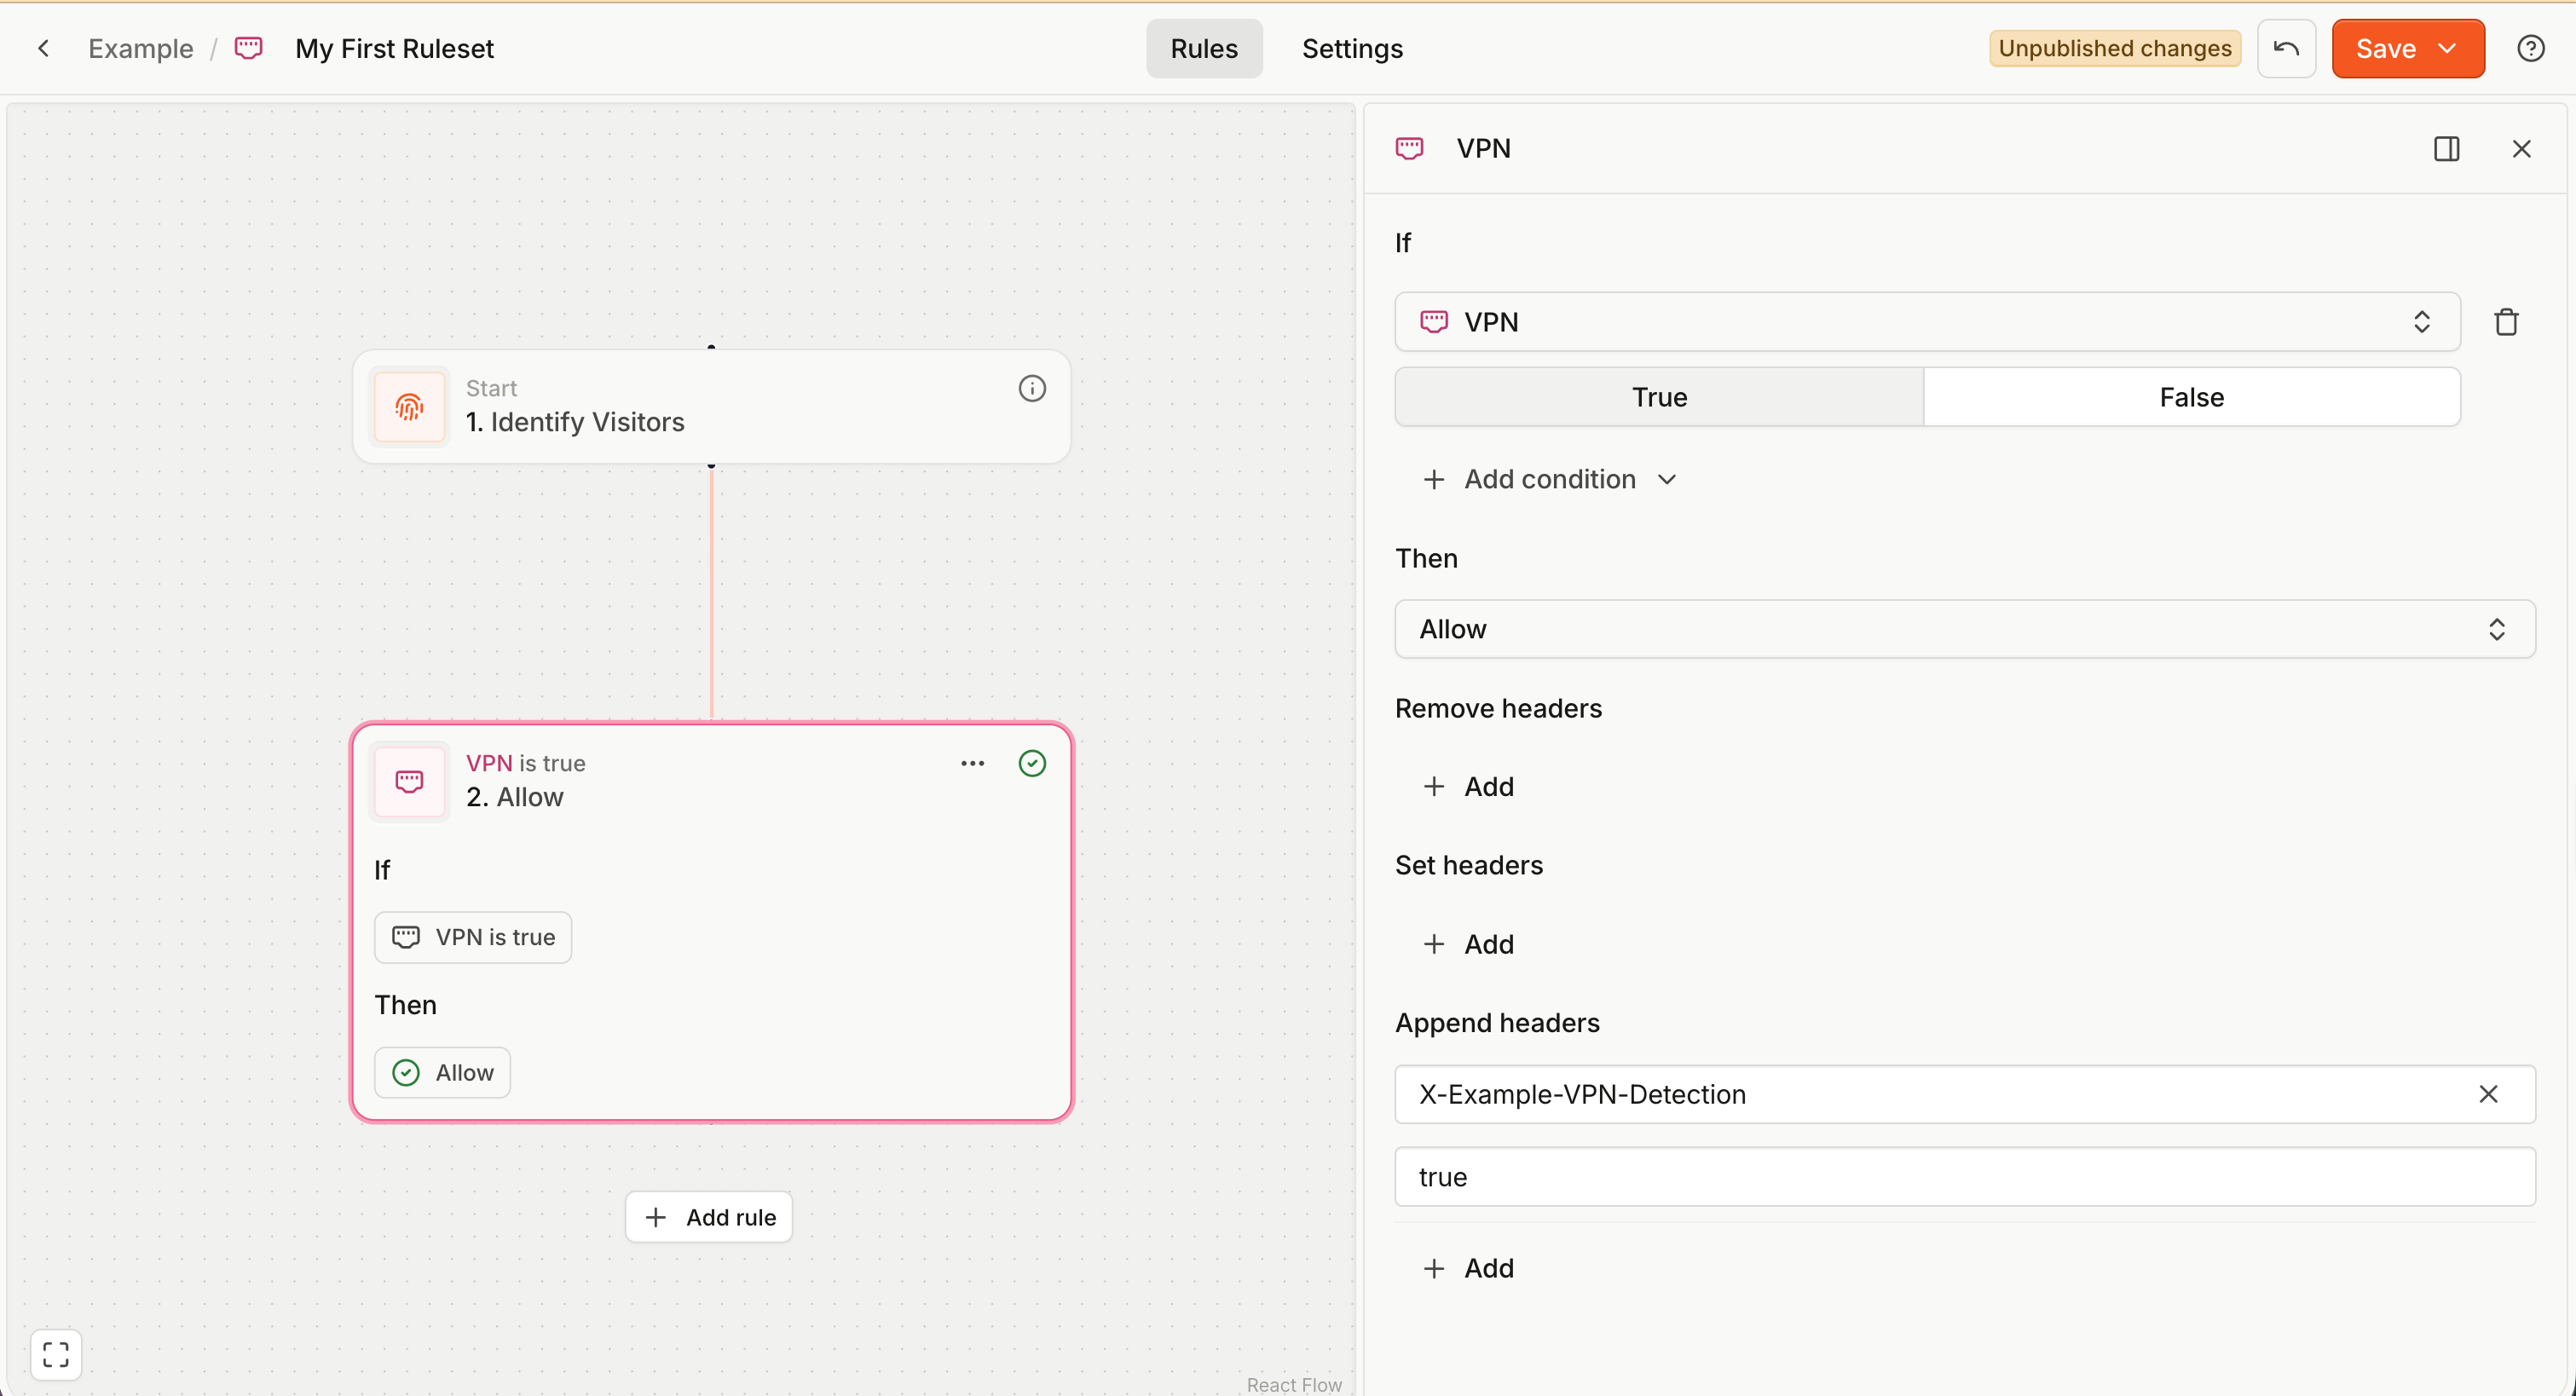
Rule action
A rule action defines what happens to the client request if the condition is true. There are two options:
- Block with response — the client (browser) request is not allowed to reach your application origin server, and a predefined response is returned to the client.
- You can define the headers and body of the returned response.
- Allow with headers — the client request is forwarded to your application origin server as normal.
- Optionally, you can modify the request headers to pass additional, predefined information to your server.
The system assumes that rule evaluation and action processing occur between your application's client (e.g., your website) and the protected functionality on your origin server (e.g., your backend). See Using the ruleset for more details.
Multiple rules
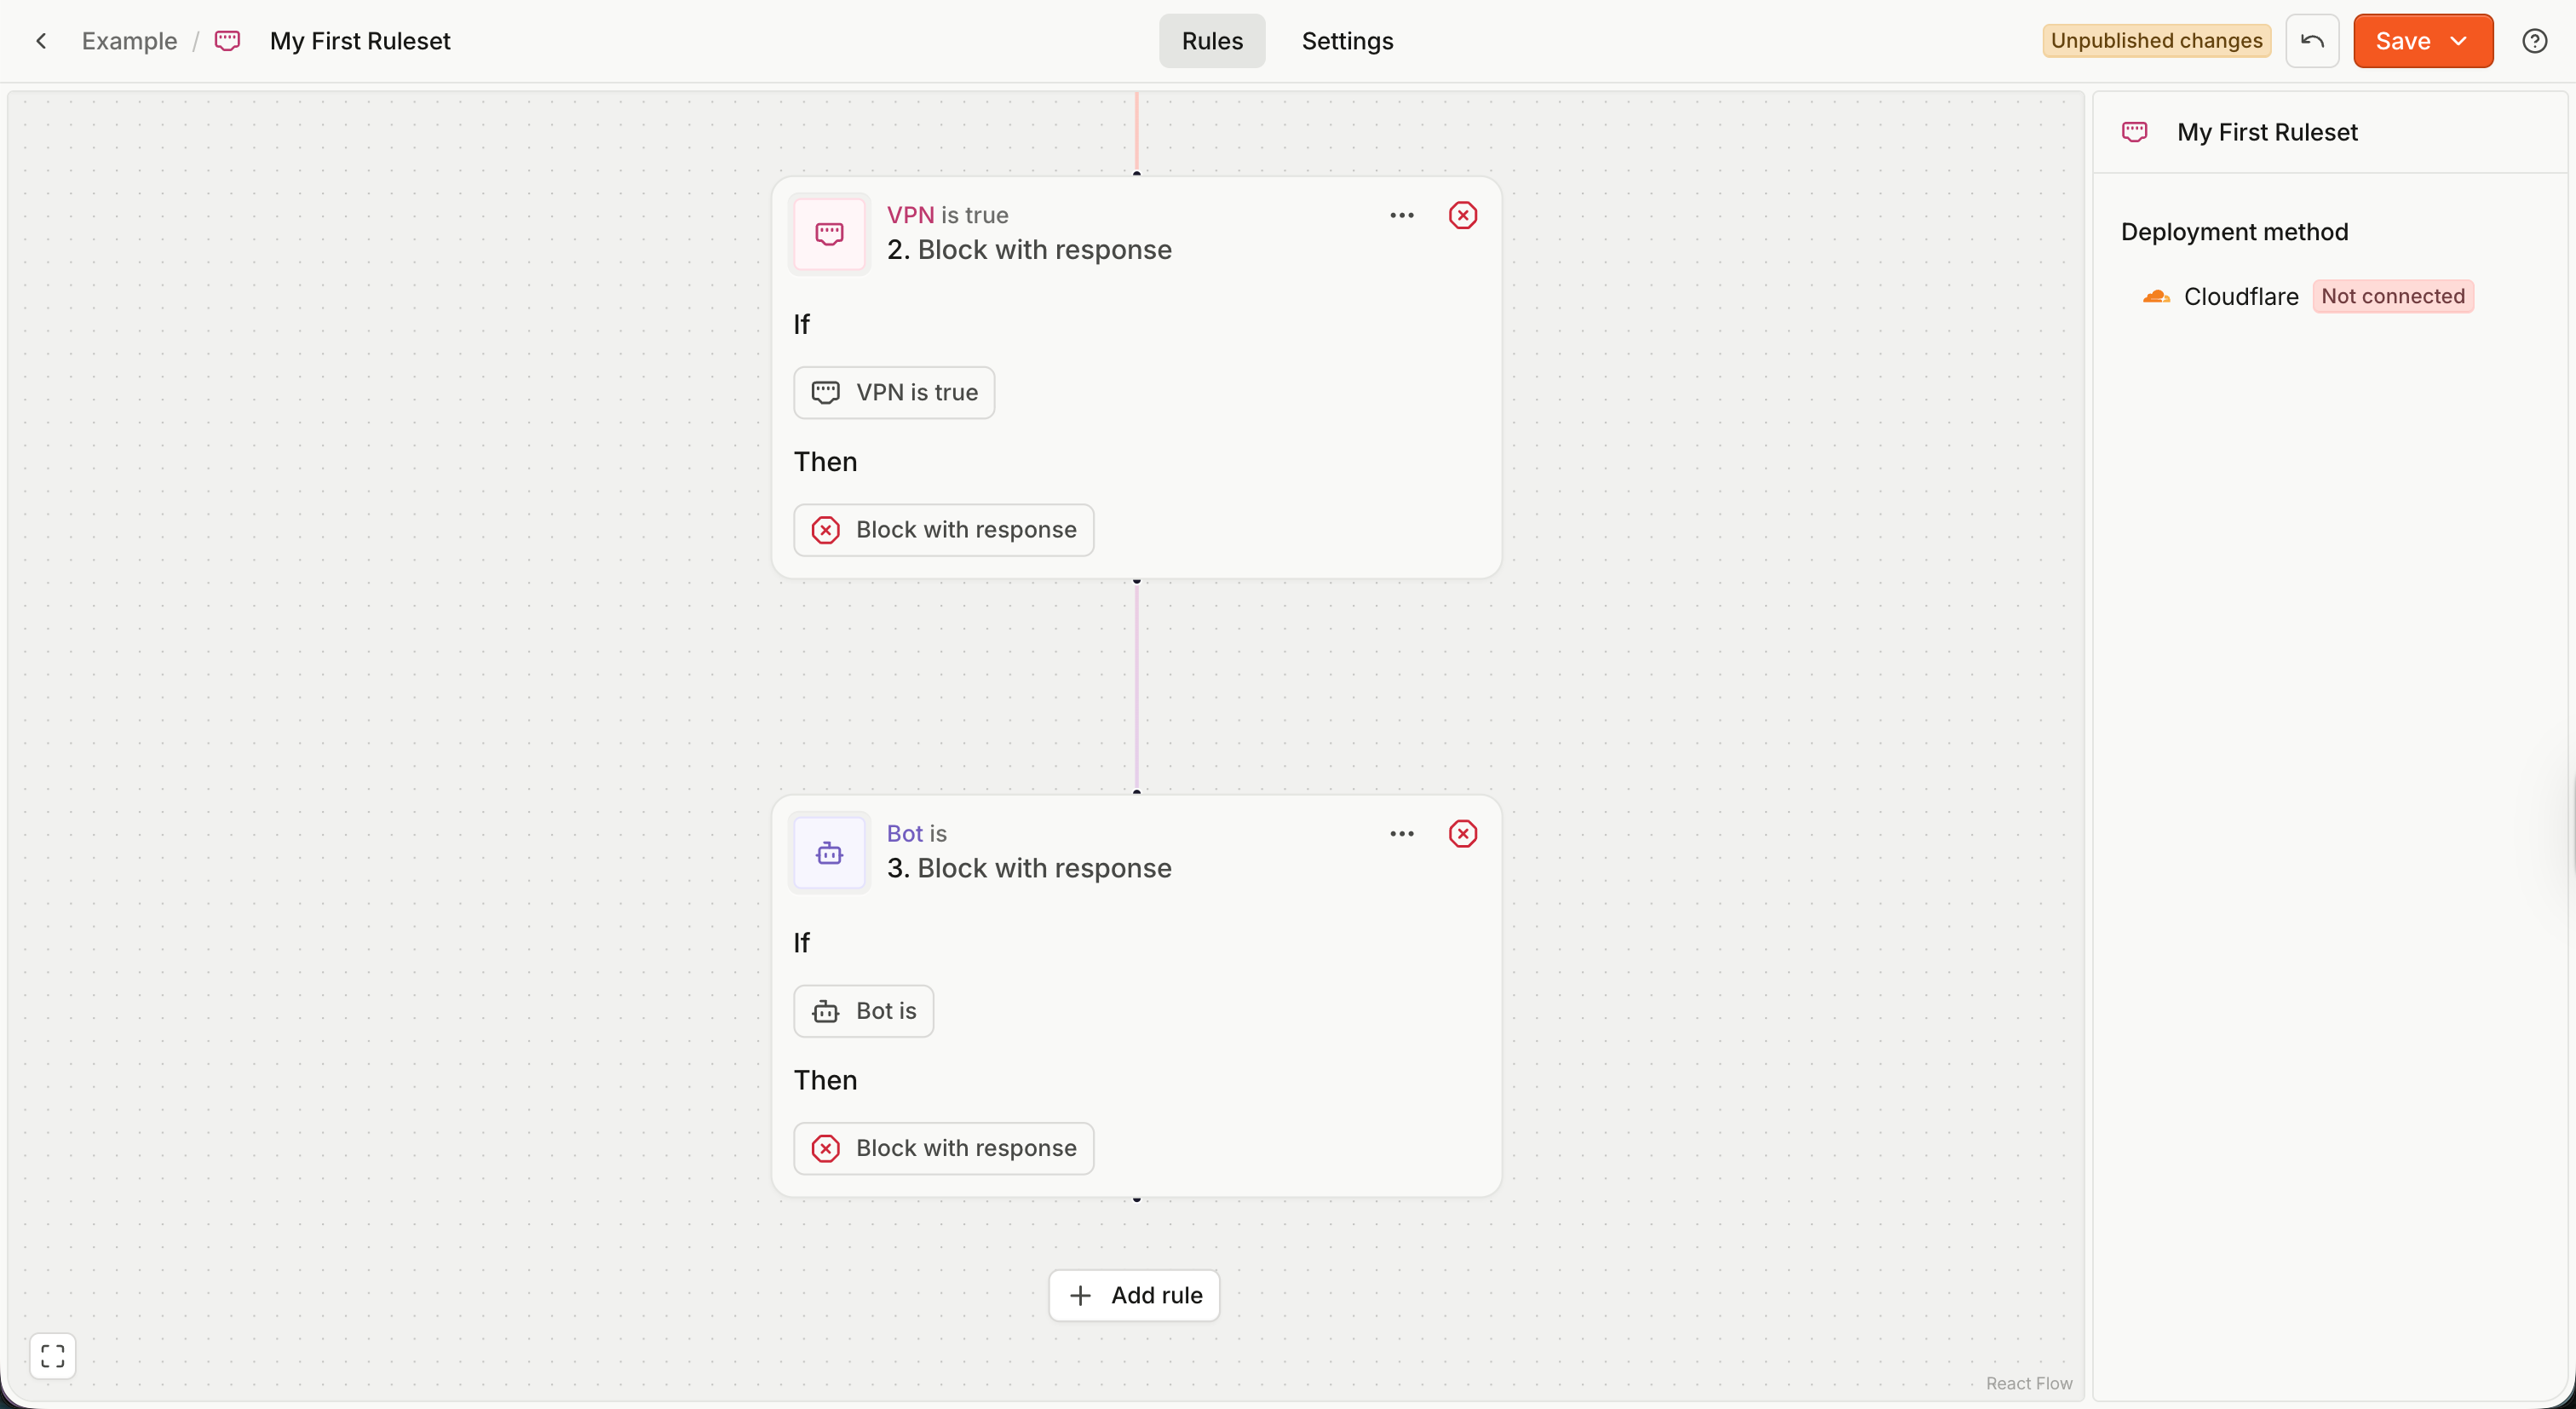
Each ruleset contains an ordered collection of rules. You can add a rule by clicking Add rule underneath your last rule on the canvas.
- Rules are evaluated first to last (top to bottom).
- When a rule is matched (its condition is true), the ruleset evaluation stops (no more rules are checked).
- The action of the matched rule is returned as the ruleset evaluation result.
- If no rules are matched, the ruleset evaluates to an Allow action without any header modifications.
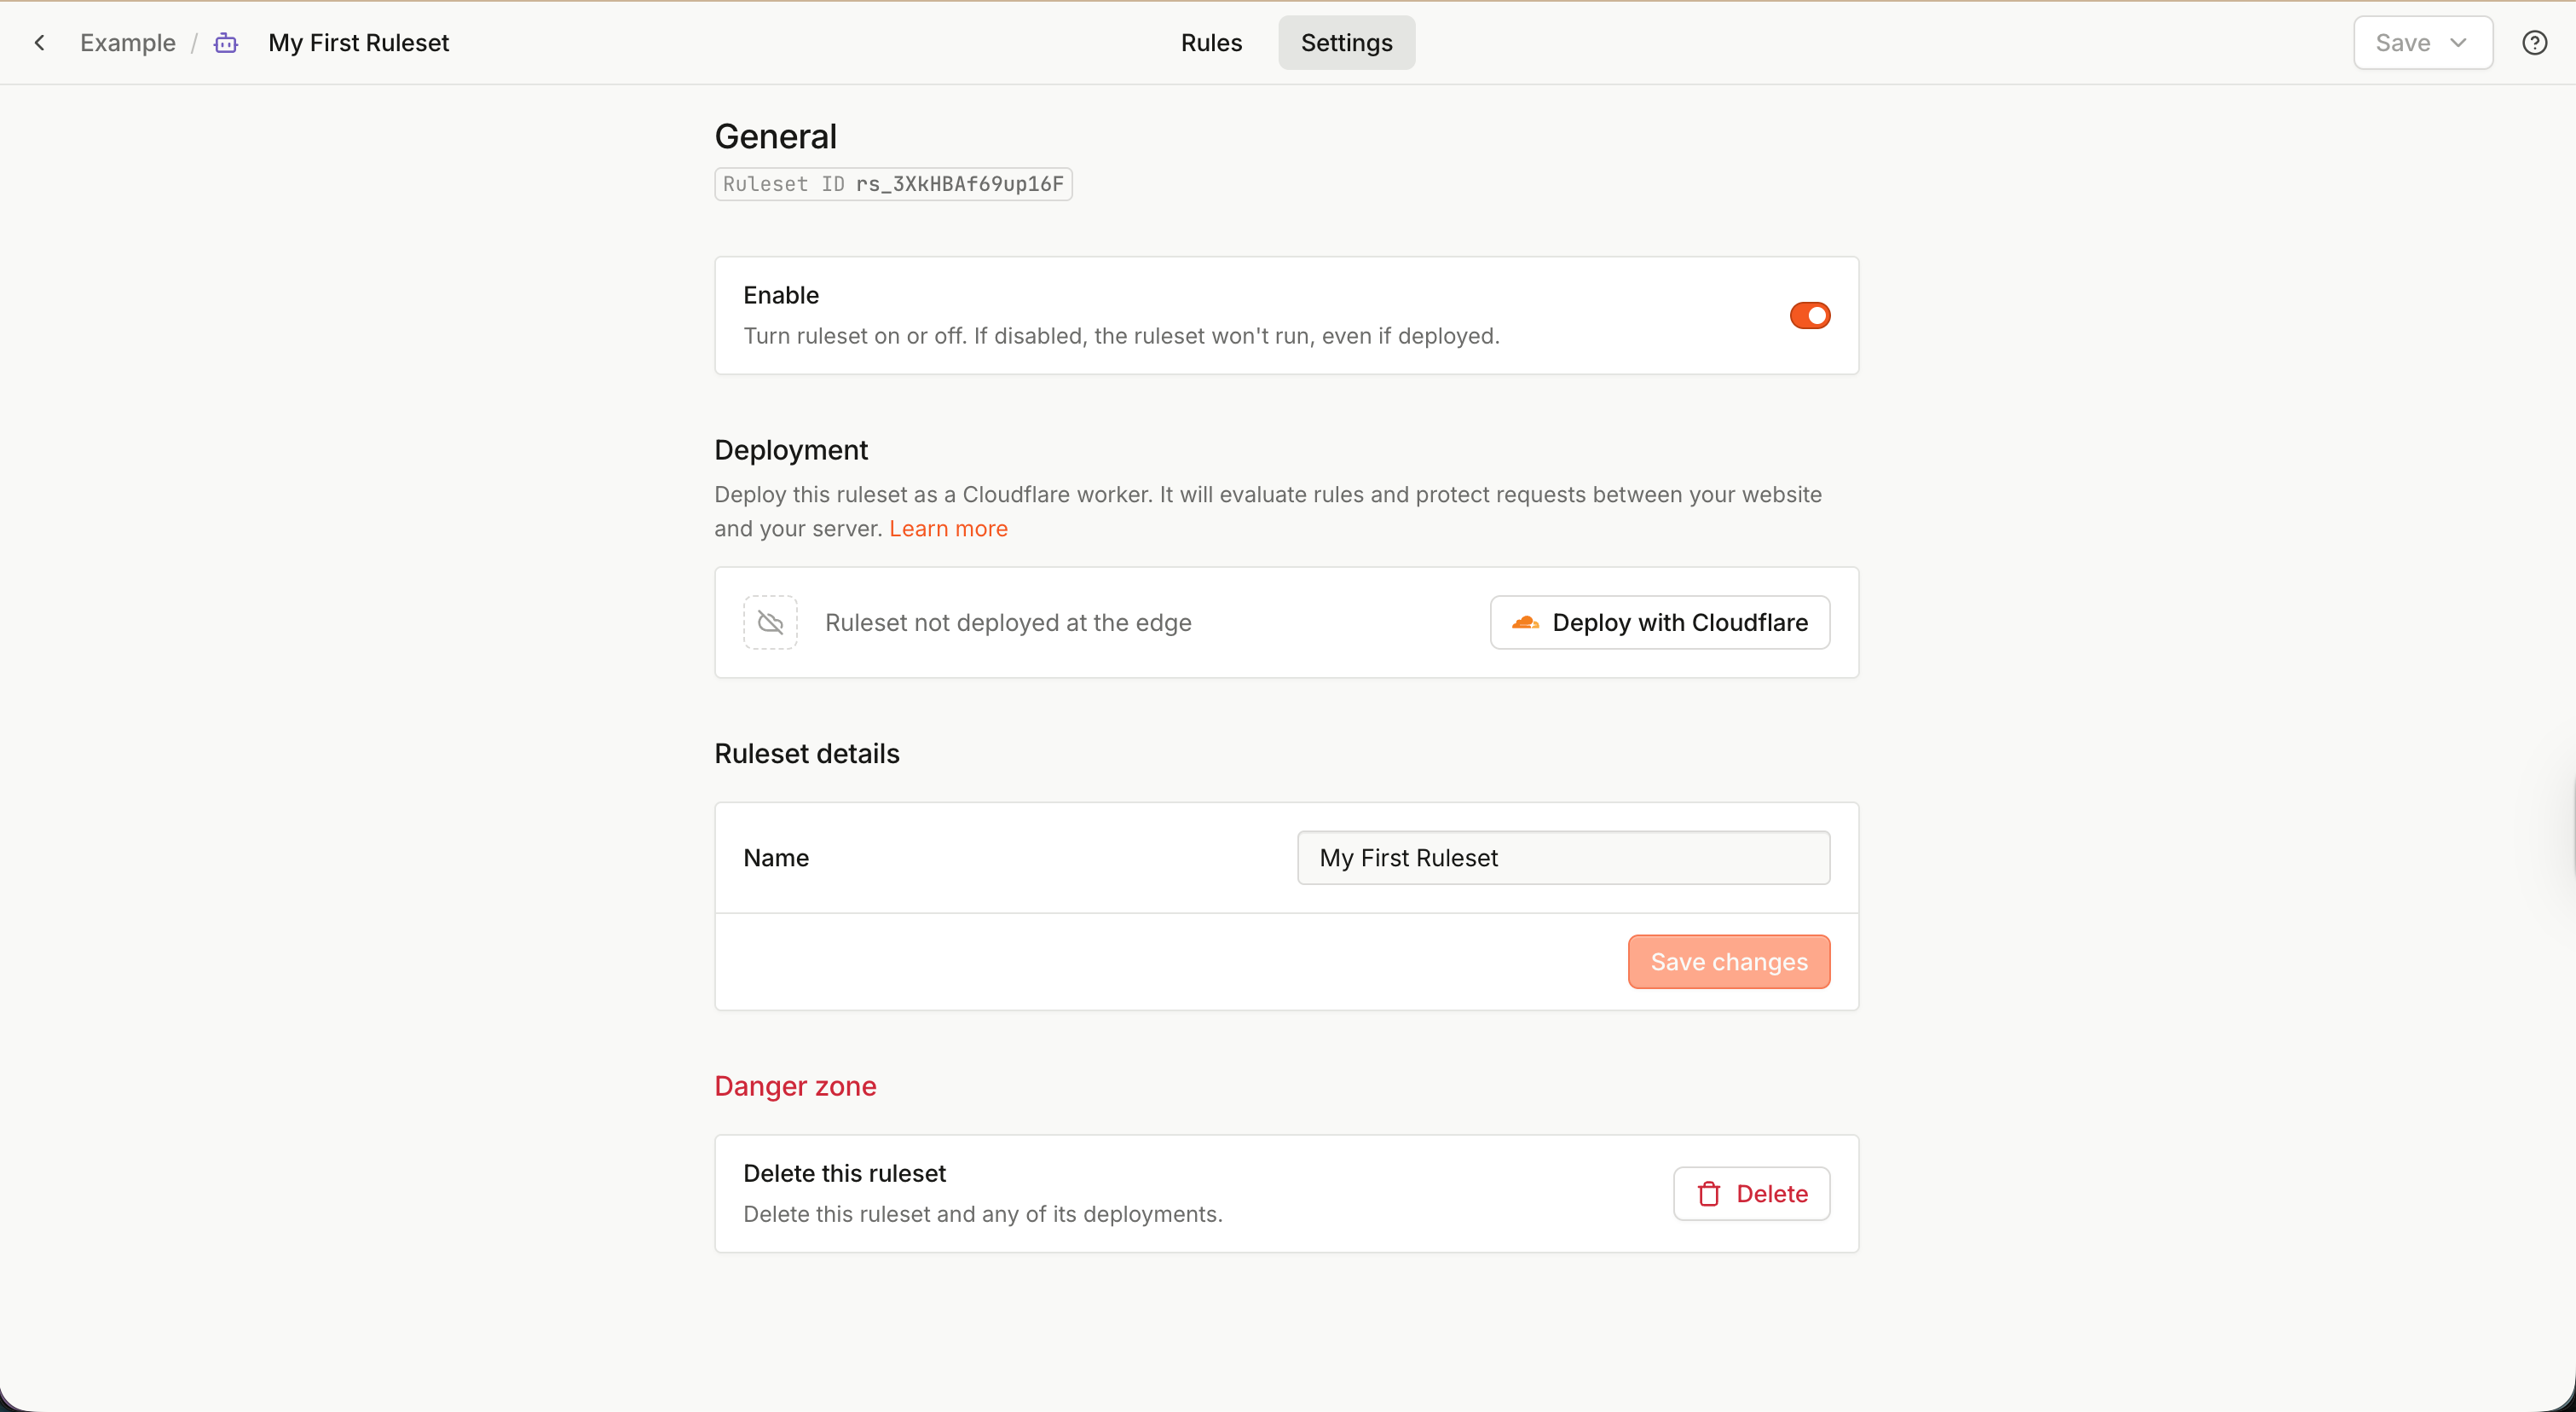
Ruleset settings
Click the Settings tab at the top to access ruleset settings. Here you can:
- Find the Ruleset ID.
- Change the ruleset Name.
- Change the ruleset Description.
- Enable or disable a ruleset.
- A disabled ruleset always evaluates to a simple Allow action without any header modifications. It is equivalent to a ruleset with zero rules.
- Deploy with Cloudflare — deploy the ruleset using a Flow worker.
- Delete the ruleset. Note that if the ruleset is deployed, you need to remove the deployment first.
Using the ruleset
An undeployed ruleset is just a row in the Fingerprint database. To actually use the ruleset, you have two options:
- Server API — Use the Fingerprint Server API to evaluate the ruleset against a specific identification event. Works with any setup; you implement handling the ruleset result yourself.
- Flow Cloudflare Workers — Deploy a Cloudflare worker on your website to identify visitors and protect API endpoints using your ruleset. No coding required. Works for websites hosted on Cloudflare.
Deployment options explainedTo illustrate the difference, a traditional Fingerprint integration without the Rules engine looks like this:
- Install the JavaScript agent or mobile SDK in your web or mobile application.
- Use a custom subdomain or a proxy integration to evade ad blockers.
- Identify the visitor and pass the Fingerprint
event_idfrom the client to your server as part of the API request you want to protect, for example, the/create-accountAPI call.- On the server, use the Server API to get the full identification result, including Smart signals.
- Write custom code to parse the identification event and handle the request accordingly. For example, returning an error instead of creating the account if
event.incognitoistrue.When using the Rules Engine with Server API, steps 1-4 remain mostly the same. Step 5 is simplified by the Rules Engine.
When using the Rules Engine with Flow Cloudflare Workers, the equivalent of all the steps (1-5) is performed by the worker, without any changes to your application code.
Ruleset evaluation using Server API
This option works well if your application is not hosted on Cloudflare or when you want to add the Rules engine to an existing Fingerprint integration.
-
Integrate Fingerprint into your application as usual (Steps 1-3 described above).
-
When retrieving the full identification event from Server API, pass the
ruleset_idof your ruleset as a query parameter to theGET /events/{event_id}API call. You can find the ruleset ID in the ruleset Settings tab and the Secret API Key in the API Keys section.curl --request GET \ --url 'https://api.fpjs.io/v4/events/<EVENT_ID>?ruleset_id=<RULESET_ID>' \ --header 'Authorization: Bearer <SECRET_API_KEY>' -
The Server API will evaluate the identification event against the ruleset and include a
rule_actionobject in the result. This is the Rule action of the matched rule or an Allow action if no rules in the ruleset matched.{ "event_id": "1768992558661.2J0stP", "identification": { /* ... */ }, "incognito": true, "rule_action": { "ruleset_id": "rs_OyQUaHCx9tgkFp", "rule_id": "r_SGSkm40YLdBSGo", "rule_expression": "incognito", "type": "block", "status_code": 403, "headers": [ { "name": "Content-Type", "value": "application/json" } ], "body": "{\"message\": \"Incognito not allowed\"}" }, /* ... */ }{ "event_id": "1768992462622.Xk9nJu", "identification": { /* ... */ }, "incognito": false, "rule_action": { "ruleset_id": "rs_OyQUaHCx9tgkFp", "type": "allow" }, /* ... */ } -
Your server code can handle the client request using the contents of the returned
rule_action, usually allowing, blocking, redirecting, or tagging the request.export async function POST(request: Request) { const body = await request.json(); const { event_id } = body; const rulesetId = 'rs_OyQUaHCx9tgkFp'; const apiKey = process.env.FP_SECRET_API_KEY; const url = `https://api.fpjs.io/v4/events/${event_id}?ruleset_id=${rulesetId}`; const response = await fetch(url, { method: 'GET', headers: { Authorization: `Bearer ${apiKey}`, }, }); const eventData = await response.json(); const { rule_action } = eventData; // If a rule_action exists and is blocking, block the client request if (rule_action?.type === 'block') { const headers = Object.fromEntries( rule_action.headers.map((h: { name: string; value: string }) => [h.name, h.value]) ); return new Response(rule_action.body, { status: rule_action.status_code, headers }); } // Action allowed, create the account (for example) and return success return Response.json({ success: true, }); }
See the Server API reference for more information.
Defining your protection rules in the Rules engine instead of keeping them in your application code directly has these benefits:
- You can update your protection rules fast, without having to update your application's source code and redeploy it. This removes friction, letting you quickly react to threats during attacks or incidents.
- Even less technical users can define and edit the rulesets directly. You can tweak protection rules without involving development teams.
Using the ruleset with Flow Workers on Cloudflare
If your goal is to protect a website hosted on Cloudflare, you can use a Flow worker to integrate Fingerprint into your website without any code or DNS changes.
The Flow worker sits between the browser accessing your website and the origin server. It automatically handles all the steps described above for you:
- Injects the JavaScript agent into the pages you define.
- For the protected API endpoints you define, it triggers visitor identification.
- It evaluates the ruleset against the identification result and applies the result, blocking the request or forwarding it to the origin server.
- Requests are naturally same-site, no need for a separate proxy integration to deal with ad blockers.
See Flow deployments on Cloudflare for more information.
Updated about 9 hours ago